Rigging/Anatomy - Human Arm Bones
As someone with a background in fine arts, figure drawing has always been a passion of mine, and studying anatomy just as much. It’s likely why I gravitate toward rigging in 3D, as I get to demonstrate my knowledge of body mechanics and form the most.
Learning rigging in school and through tutorials online you’ll find plenty of formulas of rig systems to solve the classic problems for animating the body. For an arm, special attention is paid to handling forearm twisting, elbow locking and pivoting, shoulder/torso deformation, and several other “nice to haves” for animators. But it’s difficult to just drop in a cone reader or forearm twist chain and create something believable if you don’t know the why behind it all. Bony landmarks and muscle groups and joint behaviors are just as important in 3D to learn as it is for 2D work.
My intention is to go through the human body piece by piece, starting with the arm, and eventually finishing with a full human character, ready for game engines. In this first part, I am looking at the bones and joints, modeling them out in Maya and using single influence skinning to approximate the relationships of bone movement. This will help inform placement of joints in Maya when I get to the grey model, and help identify which bone movements need more attention than just a linear joint chain. Next I will look at muscles to inform helper joints, and then finally put it all together on a character mesh, using rigging ideas from the bones and muscles.
Let’s cover each major joint in the arm chain.
The Shoulder
The relationship between the clavicle, scapula, and humerus is quite complex. All three of these bones have three rotation axes, and work in tandem with each other for most shoulder movements. In simpler rigs I’ve worked with, You can expect to find a Maya joint at the sternoclavicular joint, as well as at the glenohumeral. These operate in a standard FK chain fashion, so the animator is expected to deform the clavicle when doing arm animations. This is good for maintaining clean arcs, but would be improved with an auto system. Another issue with this simple setup is that the scapula does not necessarily move in the same arc as the clavicle. While all clavicle motions inform the movement of the scapula, the scapula additionally rotates about the acromioclavicular joint to stay flush with the organic shape of the ribcage.
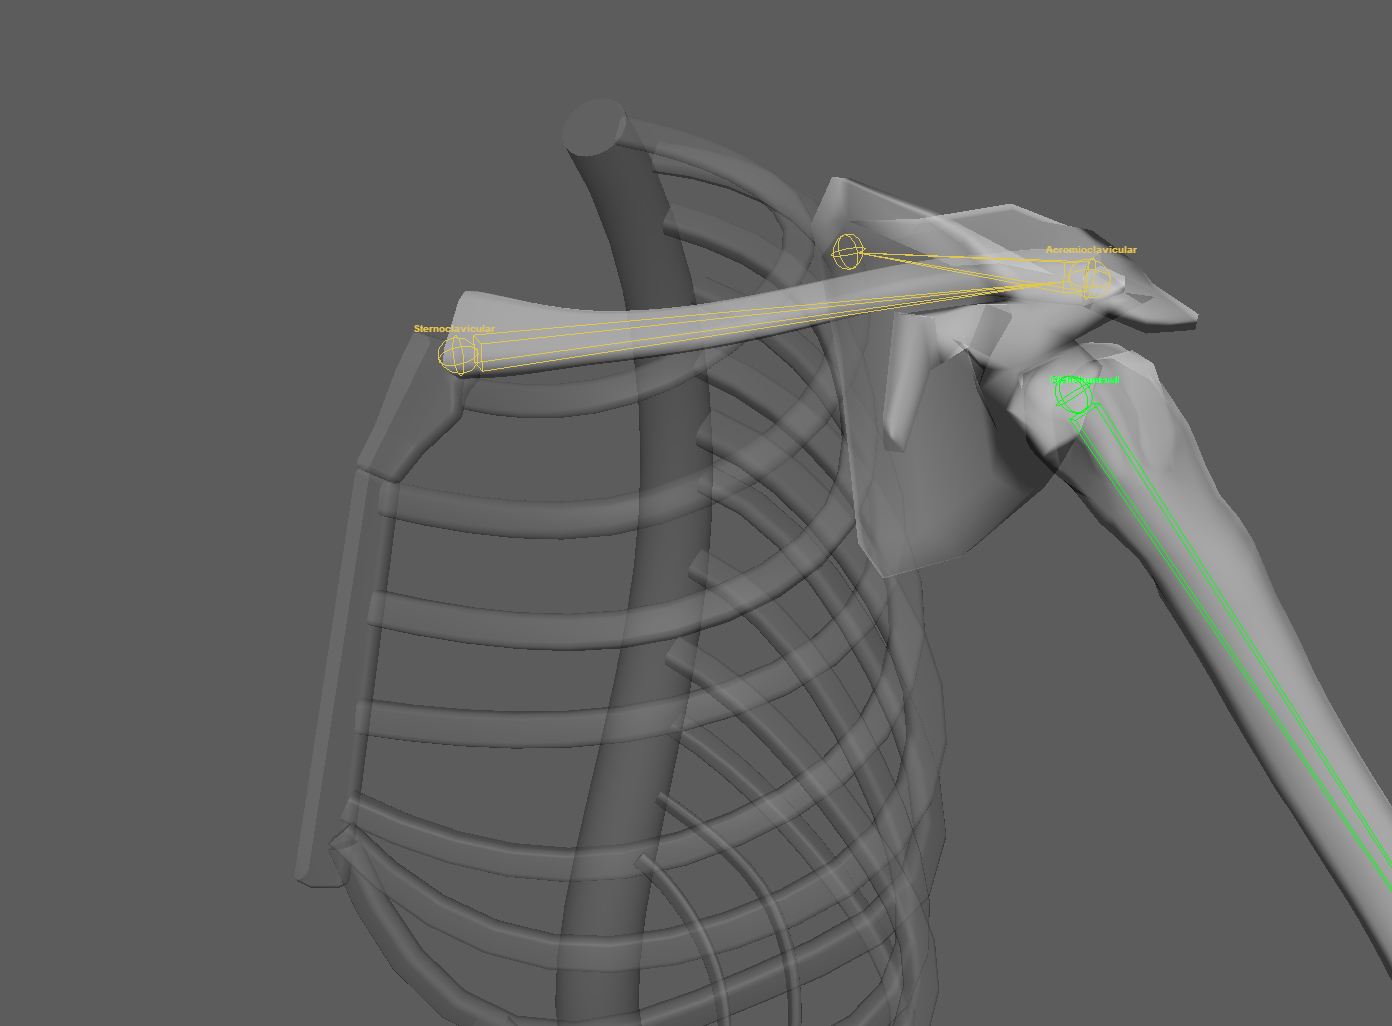
In this setup I have the clavicle chain and the arm chain separated for clarity. I will be looking into the best setup for the hierarchy once I start to add in muscles.
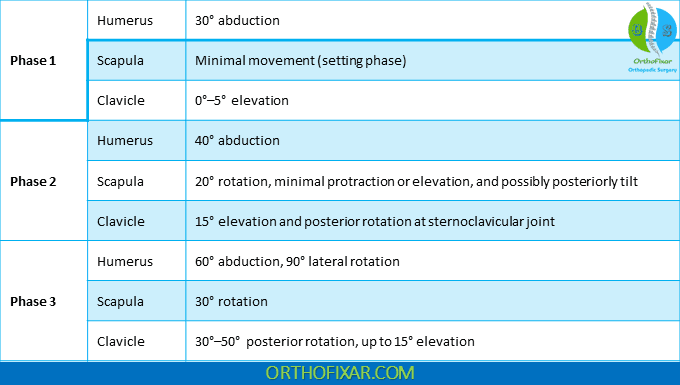
The main articulation I wanted to get at this stage is a reasonable representation of scapulohumeral rhythm. The speed at which each joint rotates changes depending on which of three angle ranges the humerus is in. You can see that I’ve settled on putting the arm bind pose at a 30 degree angle from the spine, because this is generally the point where moving the arm above the head will start to be influenced by the clavicle and scapula. Here’s a chart of the average degrees of rotation at each stage:
Before the arm reaches a 90 degree position, its rotation (and the scapula’s) is additionally compounded with the clavicle. Past 90 degrees, the motion is further accelerated by rotation at the acromioclavicular joint. As the scapula moves up, the humerus follows, so a rotation at the shoulder when aiming for realism will not stay in its bind position.
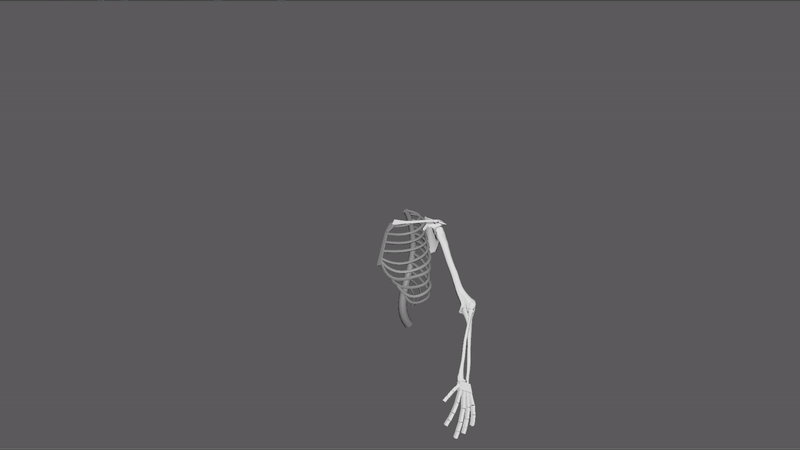
Notice the additional rotation of the scapula when the arm begins to move above the shoulders
With this auto clavicle rig system that I have put on the shoulder control, the arm will complete its full 180 degree rotation when rotate Y is at 90 (30 degree initial position + 30 degrees at clavicle + 30 degrees at scapula + 90 degrees at humerus = 180). I have this as an on-off parameter so the animator could choose to manually move the clavicle and shoulder controls.
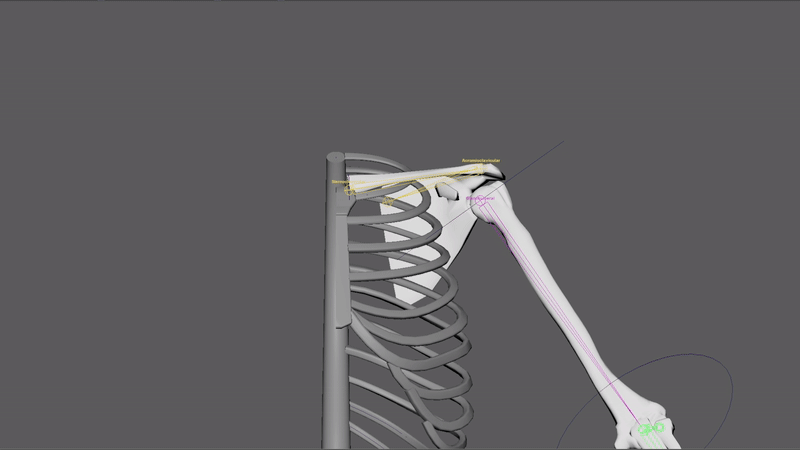
Shoulder movement demo. First motion has “Auto Clavicle” on, second is just the rotation at shoulder
I think the advantage of a clavicle system like this in a shoulder animation would be easily getting accurate motion in the torso and shoulder. However, because of the unique rhythm relationship of each joint, controlling the easing of the shoulder rotation would require additional work. Here’s some resources I found useful when looking into the shoulder relationship:
https://ouhsc.edu/bserdac/dthompso/web/namics/scapmove.htm#vertical
https://clinicalgate.com/shoulder-complex/
I will be looking into the other motions of the clavicle and scapula when covering muscles.
The Elbow
In the bone stage the elbow is much more simple than the shoulder. The elbow only moves in one degree of freedom, so the main concern was accurately modeling the relationship between the proximal ends of the Ulna and Radius, and setting them against the distal end of the humerus. Having these accurately proportioned will be super helpful for positioning the elbow joint in the final model. Here is the elbow rotation:
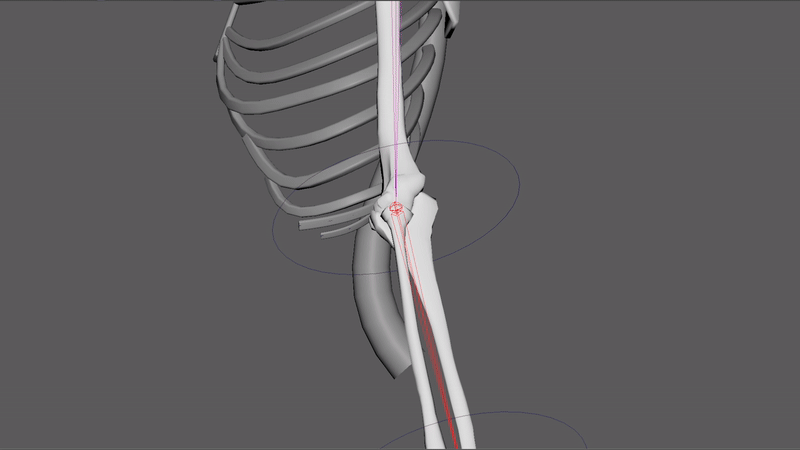
I wanted to make sure that the epicondyles and olecranon maintained their Hueter Triangle relationship so that it can serve as a guideline for skinning later down the road.
The Wrist
The wrist is one of the most complex areas of deformation in the entire body. Supination/pronation is a unique crossing over of two bones that cannot be simply represented by just placing a joint at the wrist. By researching the anatomy and function of the forearm, I came across two ideas that seem counter-intuitive to how an arm rig is set up.
For one, the rolling over of the forearm takes place at the elbow, not the wrist. The radius bone rotates around its proximal head and turns the distal end of the radius over the ulna. But for an animator, having that control at the wrist is way more convenient because we wouldn’t want one of the motions of the wrist to be controlled at the elbow.
The second part is that the turning over of the bones at the wrist does not happen in the center of the wrist. We want to place the wrist joint in a central location because flexion/extension and abduction/adduction happen from there. But when the arm pronates/supinates, its rotating around the end of the ulna, not the space between the ulna and the radius. In order to get anatomically accurate motion, we would need two pivot points in the wrist. Although, in everyday articulation, the wrist appears to rotate around the center because the rest of the arm compensates to keep the hand in place. Ideally, the animator would not have to think about the counter-animation of the rest of the arm, which is why the forearm twist happens around the center as well.
These two above points are part of the reason why clever setups are needed to get the perfect balance between believable deformation and animator ease of use. In this bone phase of the arm, I employed a two pivot point setup like I mentioned. This allowed me to maintain the one joint per bone idea, but it also causes the wrist to not rotate accurately after supination. When I get to the grey model rig, I will be looking into various setups for the forearm to test the pros and cons of each.
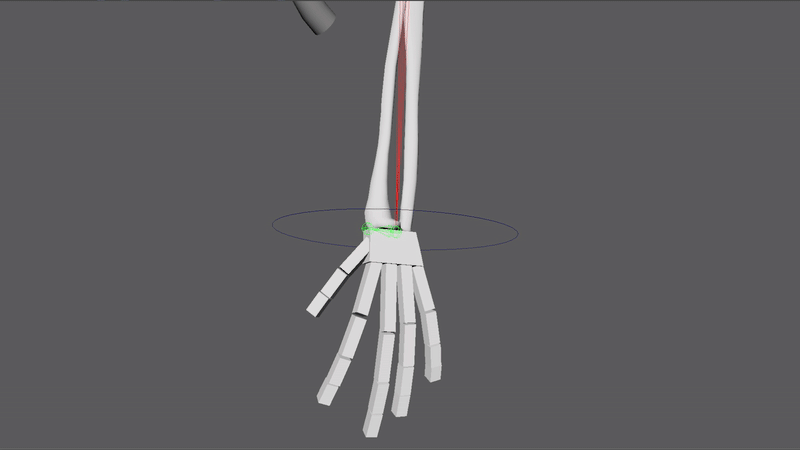
The radius is bound to a joint at the elbow which points to the head of the ulna. When the radius joint rotates, it swings the radius as expected. The hand is bound to a joint at the end of the radius. Because the main wrist joint isn’t right on the head of the ulna, the hand joint has to be translated to offset the hand and mimic the elliptical rotation path. It is then obvious why this wouldn’t work in a skinned setup, because the main wrist joint now cannot rotate around the center of the hand. This setup will have to be revisited during the grey model phase.
For the next part, I will be modeling and skinning the key muscles involved in the major movements of the arm. From this I hope to get a better idea of the placement and movement required of helper joints to accurately deform muscles in motion.