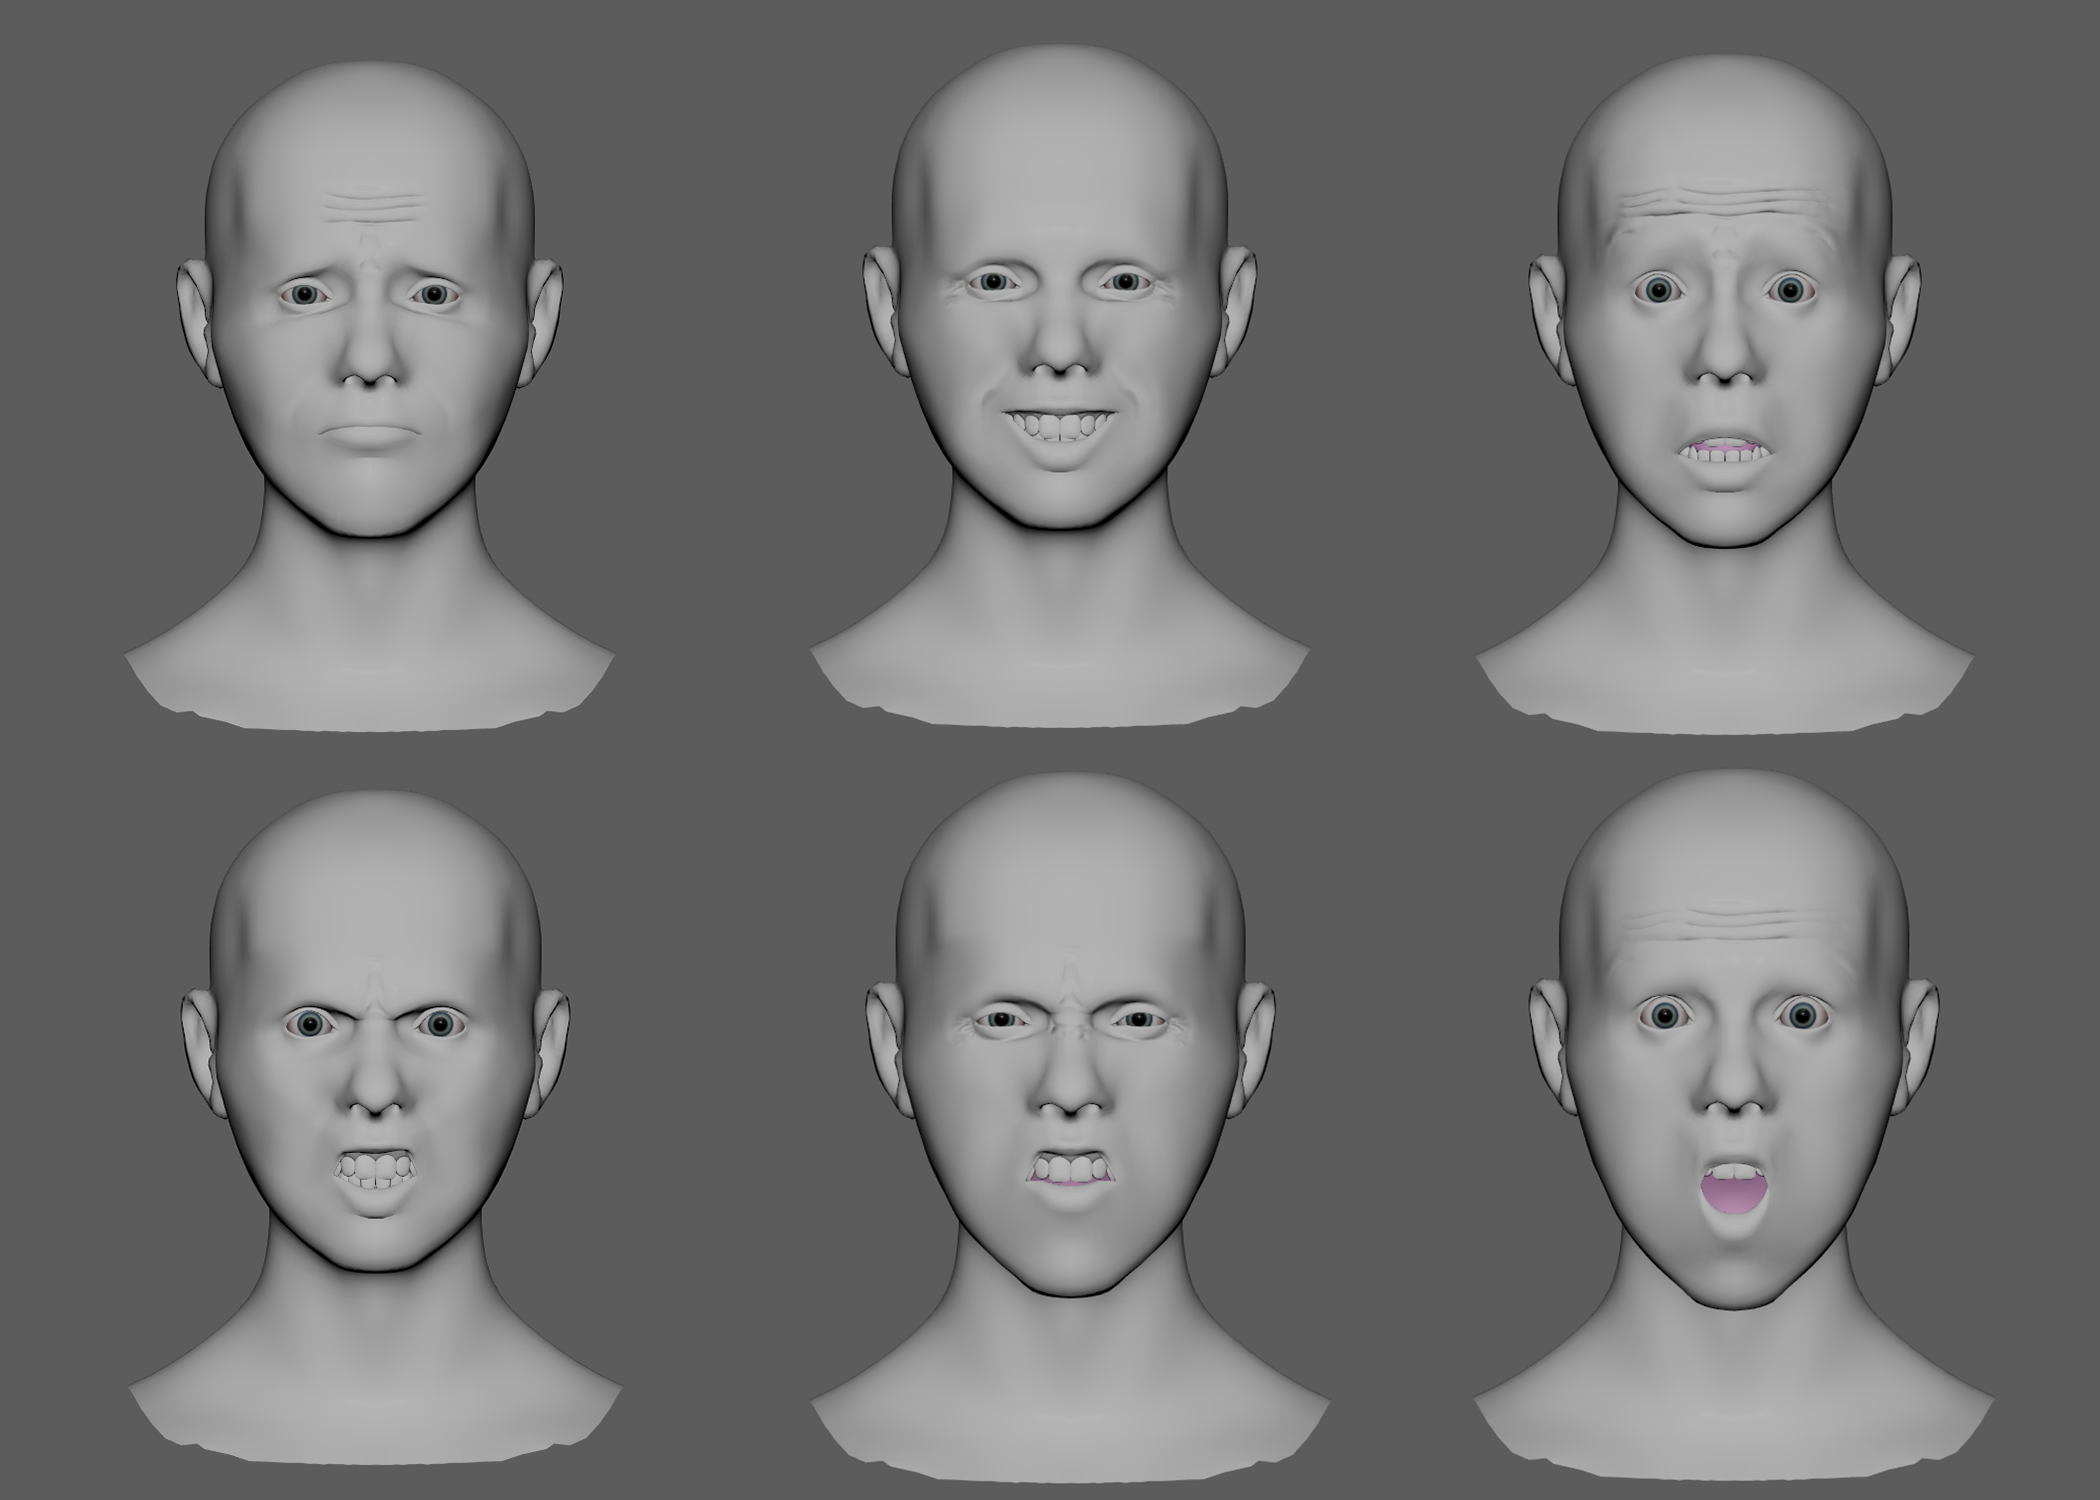
Face Rig
This base human face rig is designed to be gameplay compatible in Unreal Engine 5. The goal was to get the rig to believably articulate the six cardinal expressions: joy, sadness, anger, fear, disgust, and surprise. These are accomplished using 40 joints, with additional blendshapes and dynamic normal maps contributing to corrective shapes and expression wrinkles.
Deformation
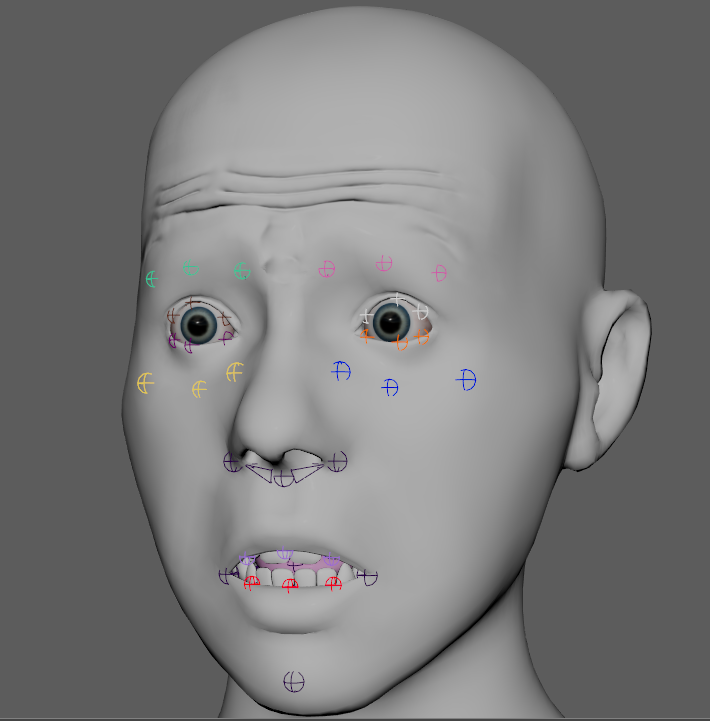
The joints’ placement is informed by the FACS system to determine key movements in the face. One joint does not represent one FACS element, but joints animated together can achieve a large amount of FACS motion. Areas like the brow, cheek, eyelids, and mouth are built around the three-curve principle described by Brian Tindall in “The Art of Moving Points.” This way, each element of the face can be tweaked in thirds, but together can create macro movements that are characteristic of the main facial expressions.
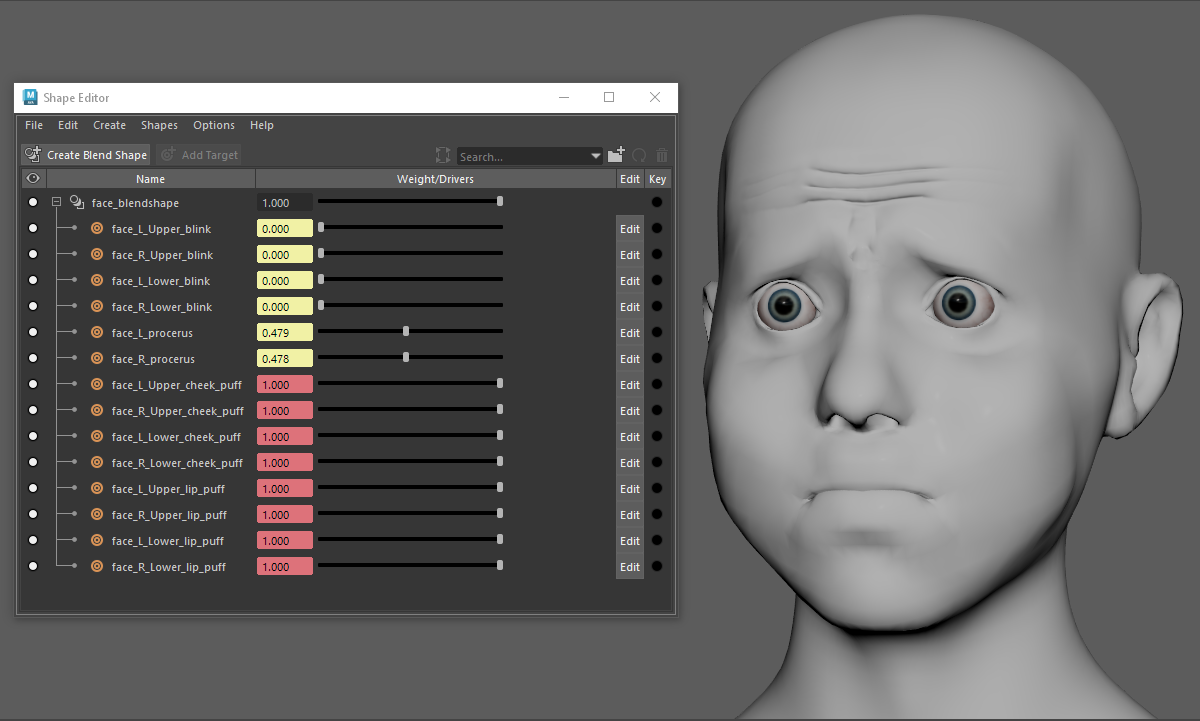
The rig has 14 blendshapes. These are used to correct eyelid movement, procerus squeeze, and allow for a dynamic cheek puff motion. The six emotions are achievable without them, should the rig need to be more economical in engine.
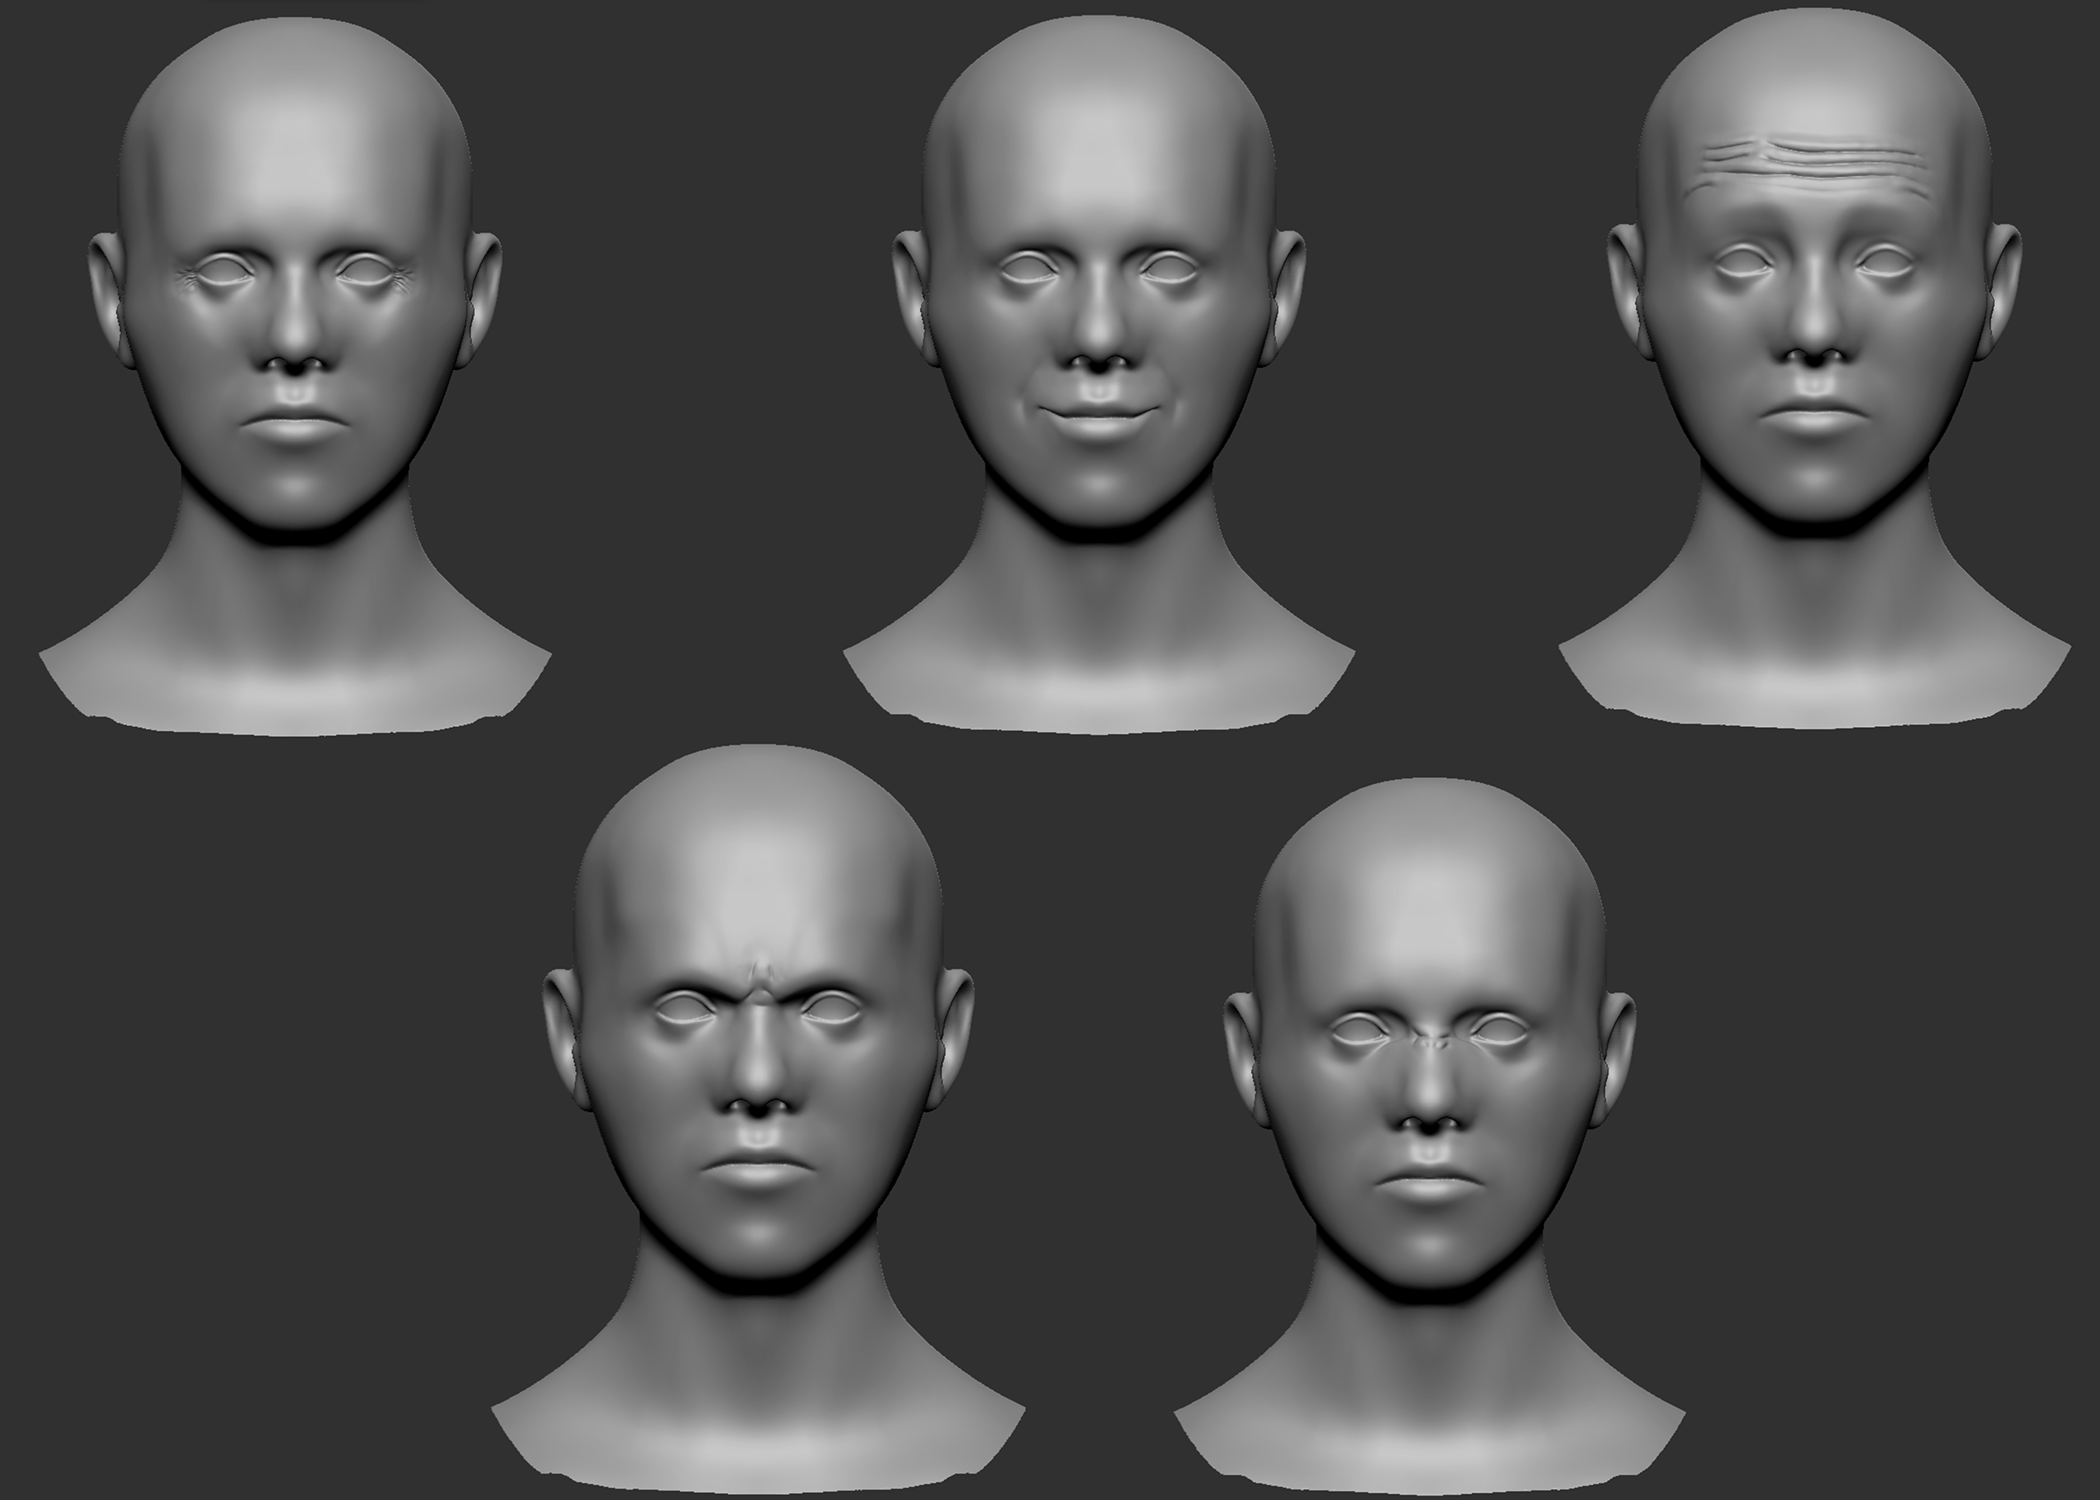
Dynamic wrinkles like those on the frontalis, crows feet, and nasolabial folds enhance the believability of emotion. I approach wrinkles by using normal maps that are greyscale masked, and then driven by displacement values of joints from their bind pose. The base mesh, as well as the five wrinkle sculpts, were done in ZBrush and then baked onto the low poly mesh with Substance Painter.
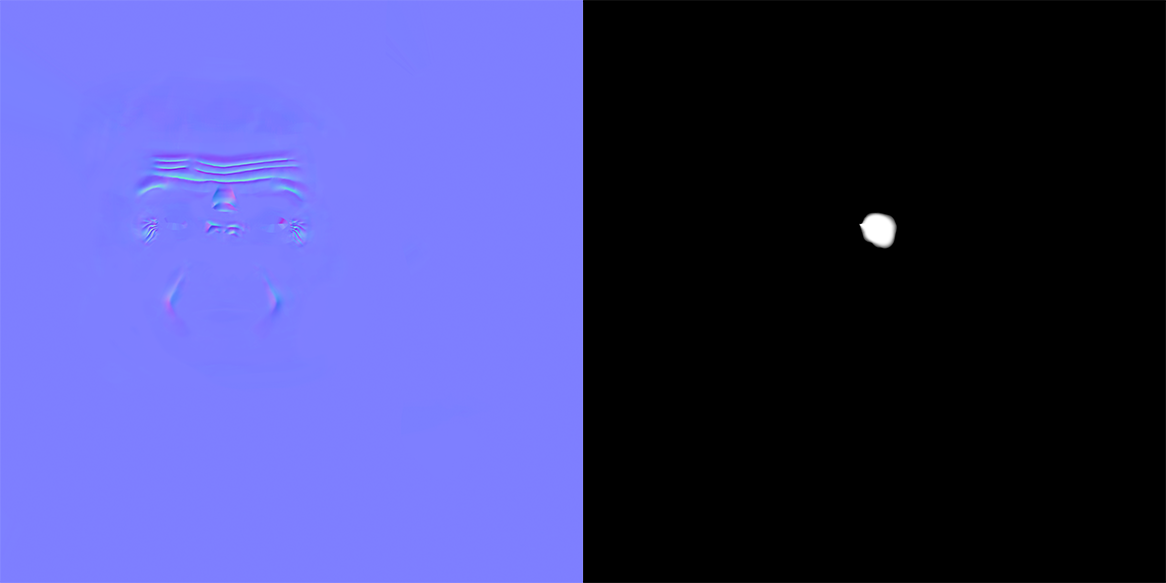
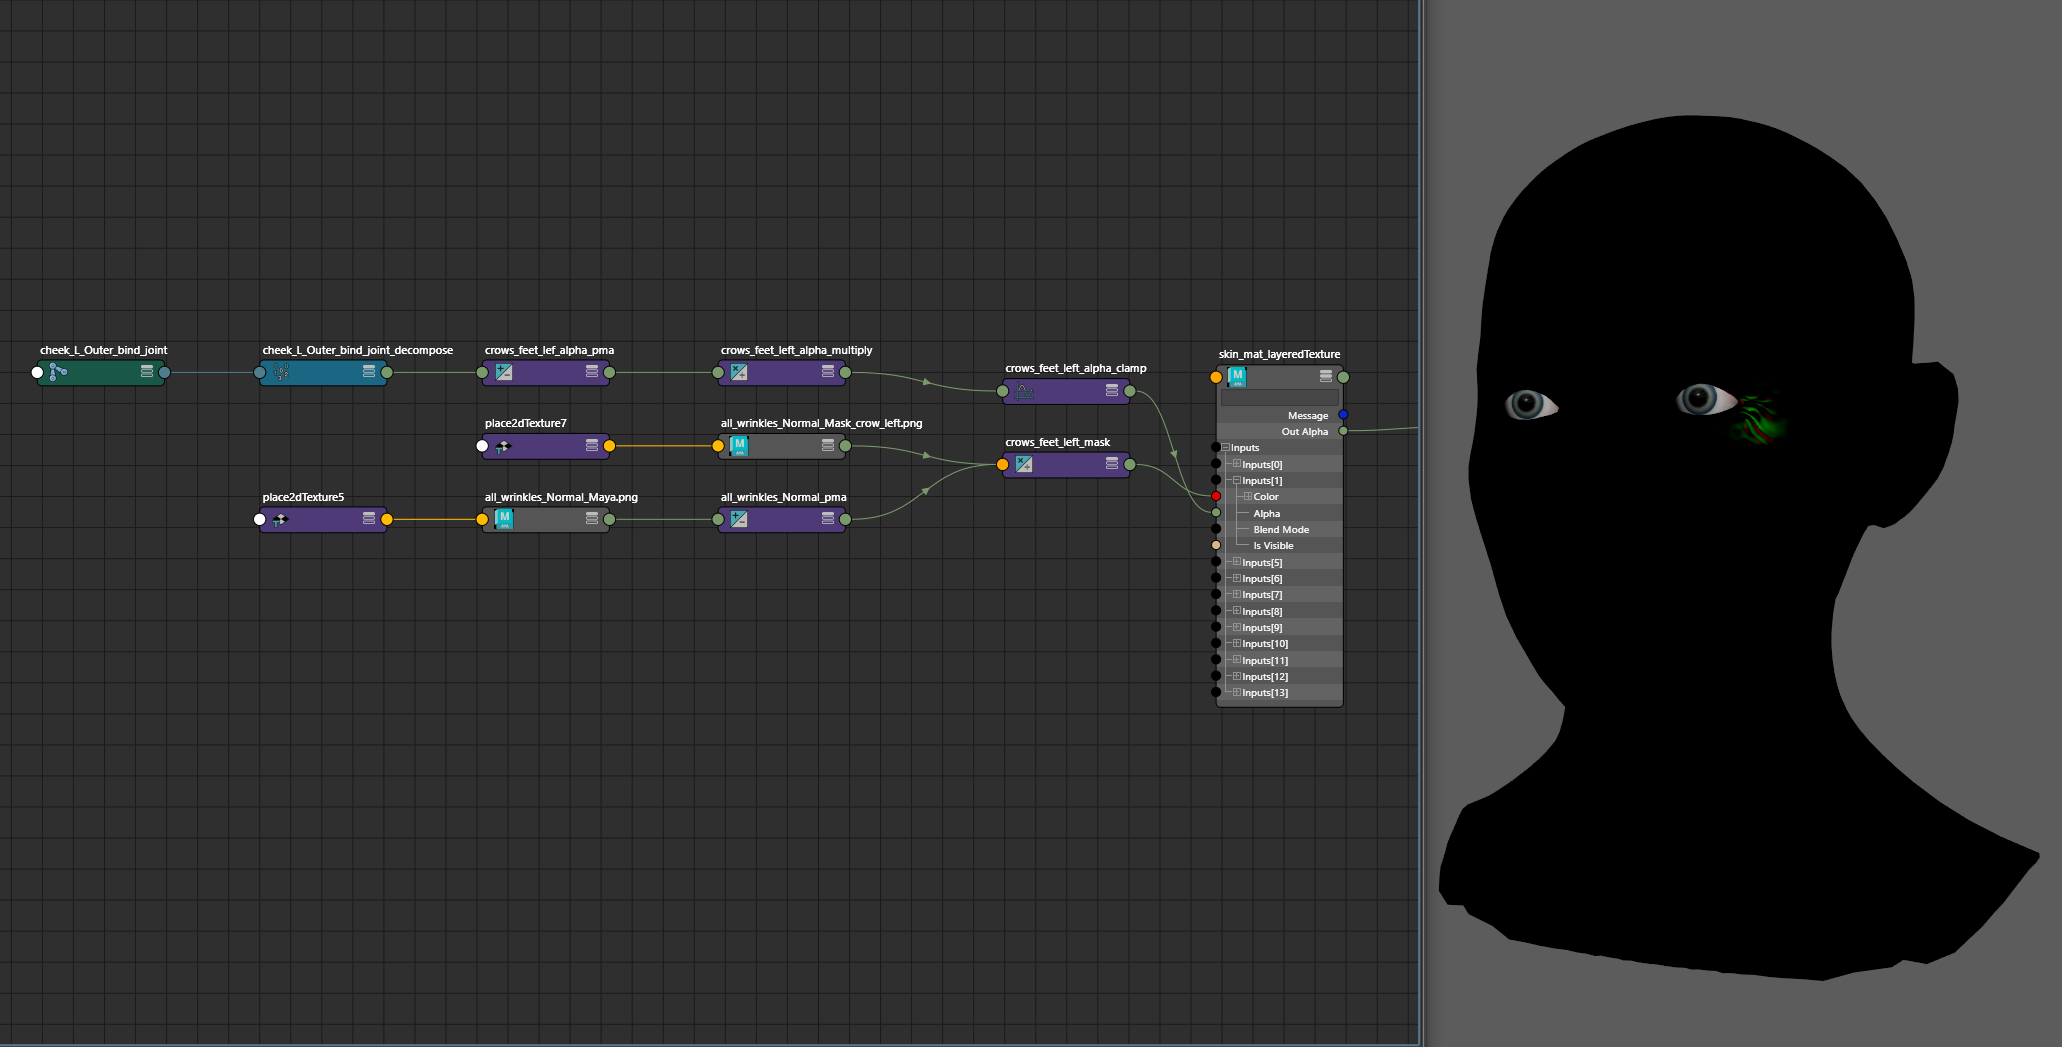
For each wrinkle region, a corresponding greyscale mask was created, and driven by the joint closest to the region that would create those wrinkles on a face.
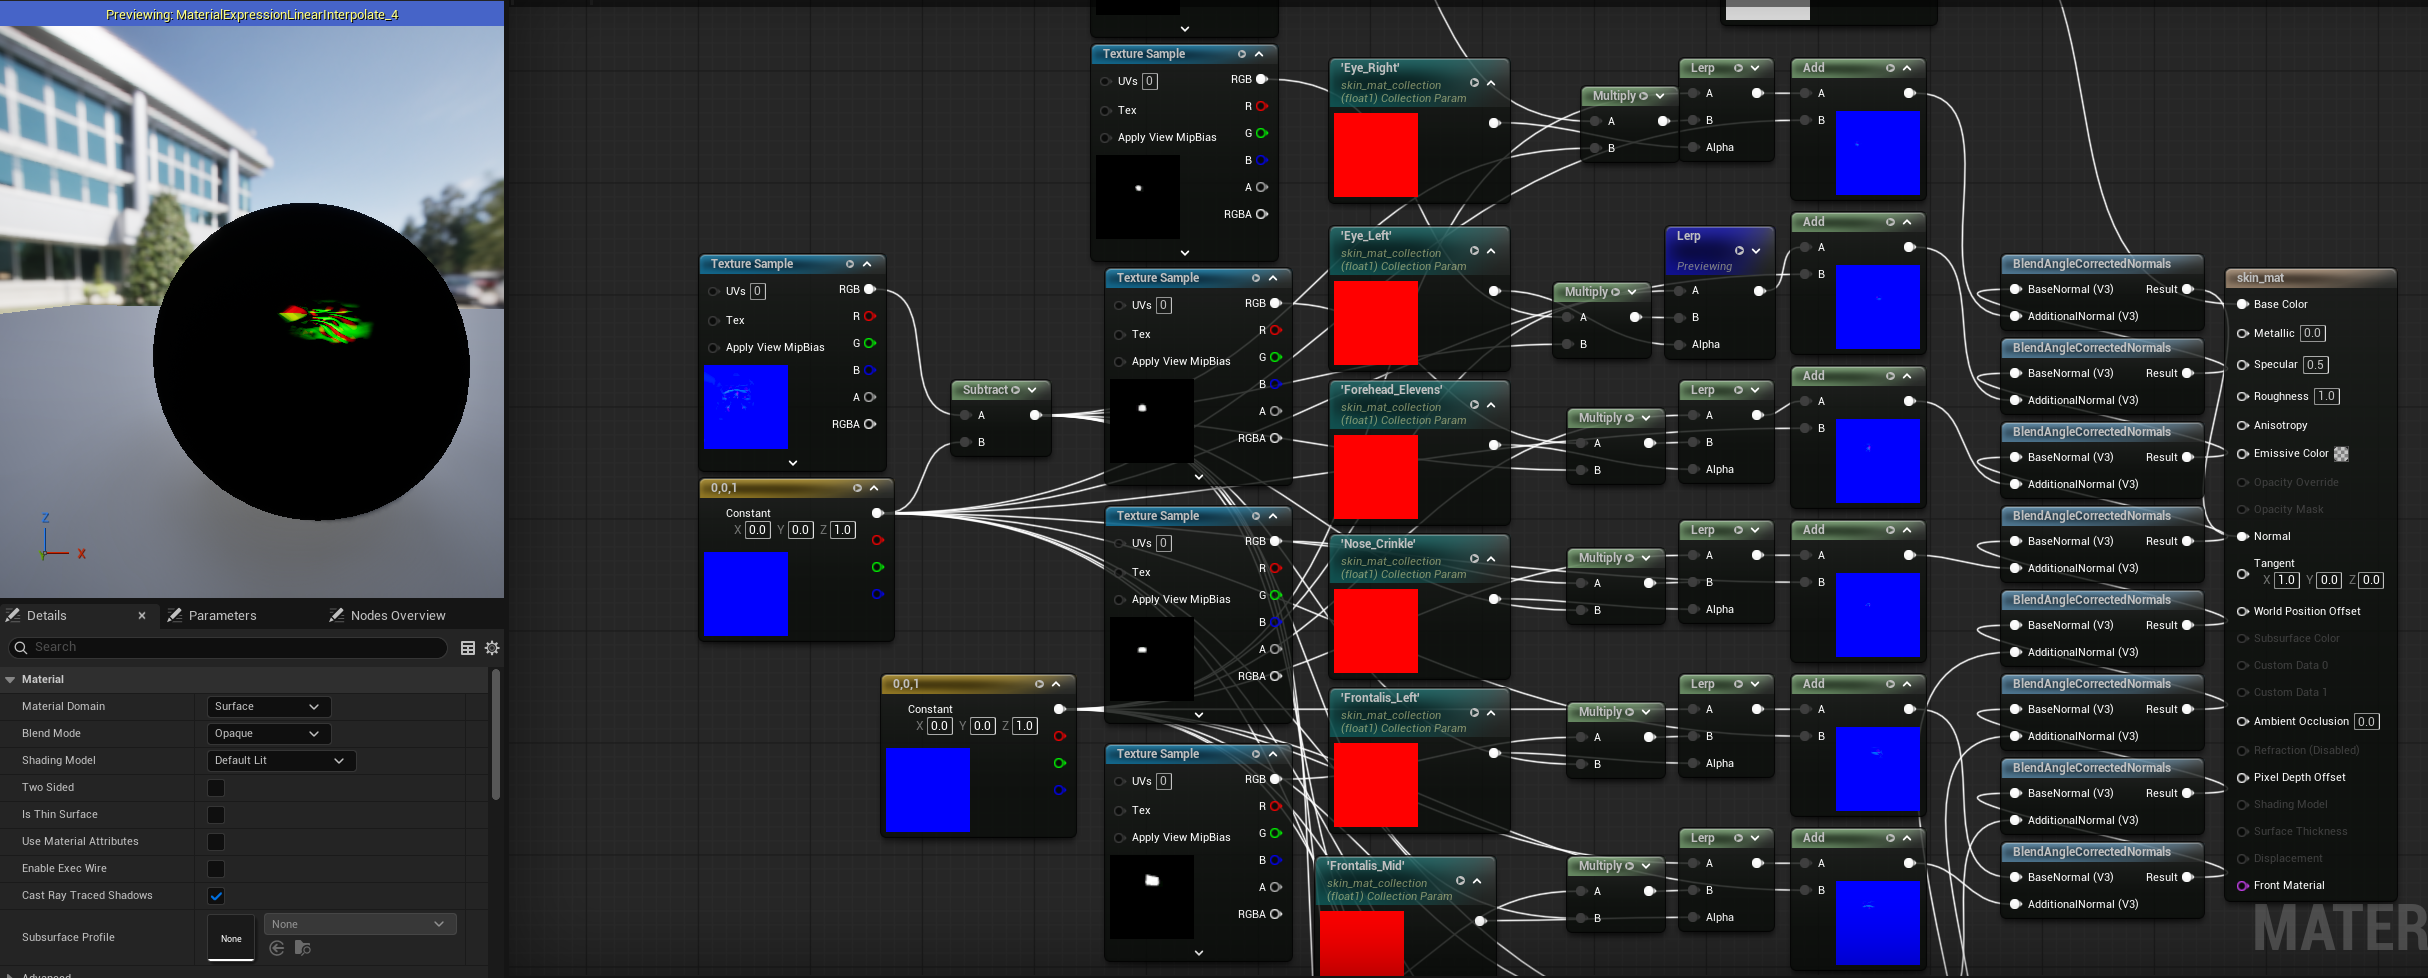
Each of those isolated normal maps were then combined onto one. In Maya, the implementation is done with a LayeredTexture node so the animator gets feedback in the viewport of the animation before sending it to Unreal. In UE5, A Material Collection holds the parameters that drive the 0 to 1 scale of each mask, before blending it back into the main material with BlendAngleCorrectedNormals. The joints that drove the normal maps in Maya have their initial positions queried in the Character Blueprint. Those values are evaluated against the change in position of the joint during the animation, and that value from 0 to 1 changes the Material Collection from the Animation Blueprint.
Control
There are two layers of control for this rig. The driver logic has no constraints, being built completely on Matrix Math nodes in Maya. Having multiple layers of control is clean in my setups when taking advantage of the OffsetParentMatrix attribute. My control and driver hierarchy can be flat, so nodes that hold initial offset positions are only calculated once, not with every evaluation of the DAG hierarchy.
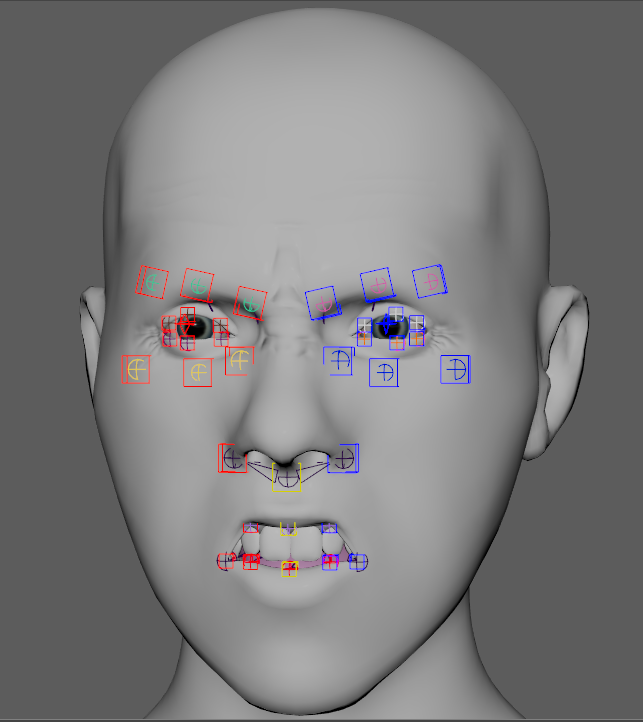
The first control layer is 1 to 1. Each joint on the face can transform with its associated NURBS curve, so animators can get finer tweak control in nuanced expression.
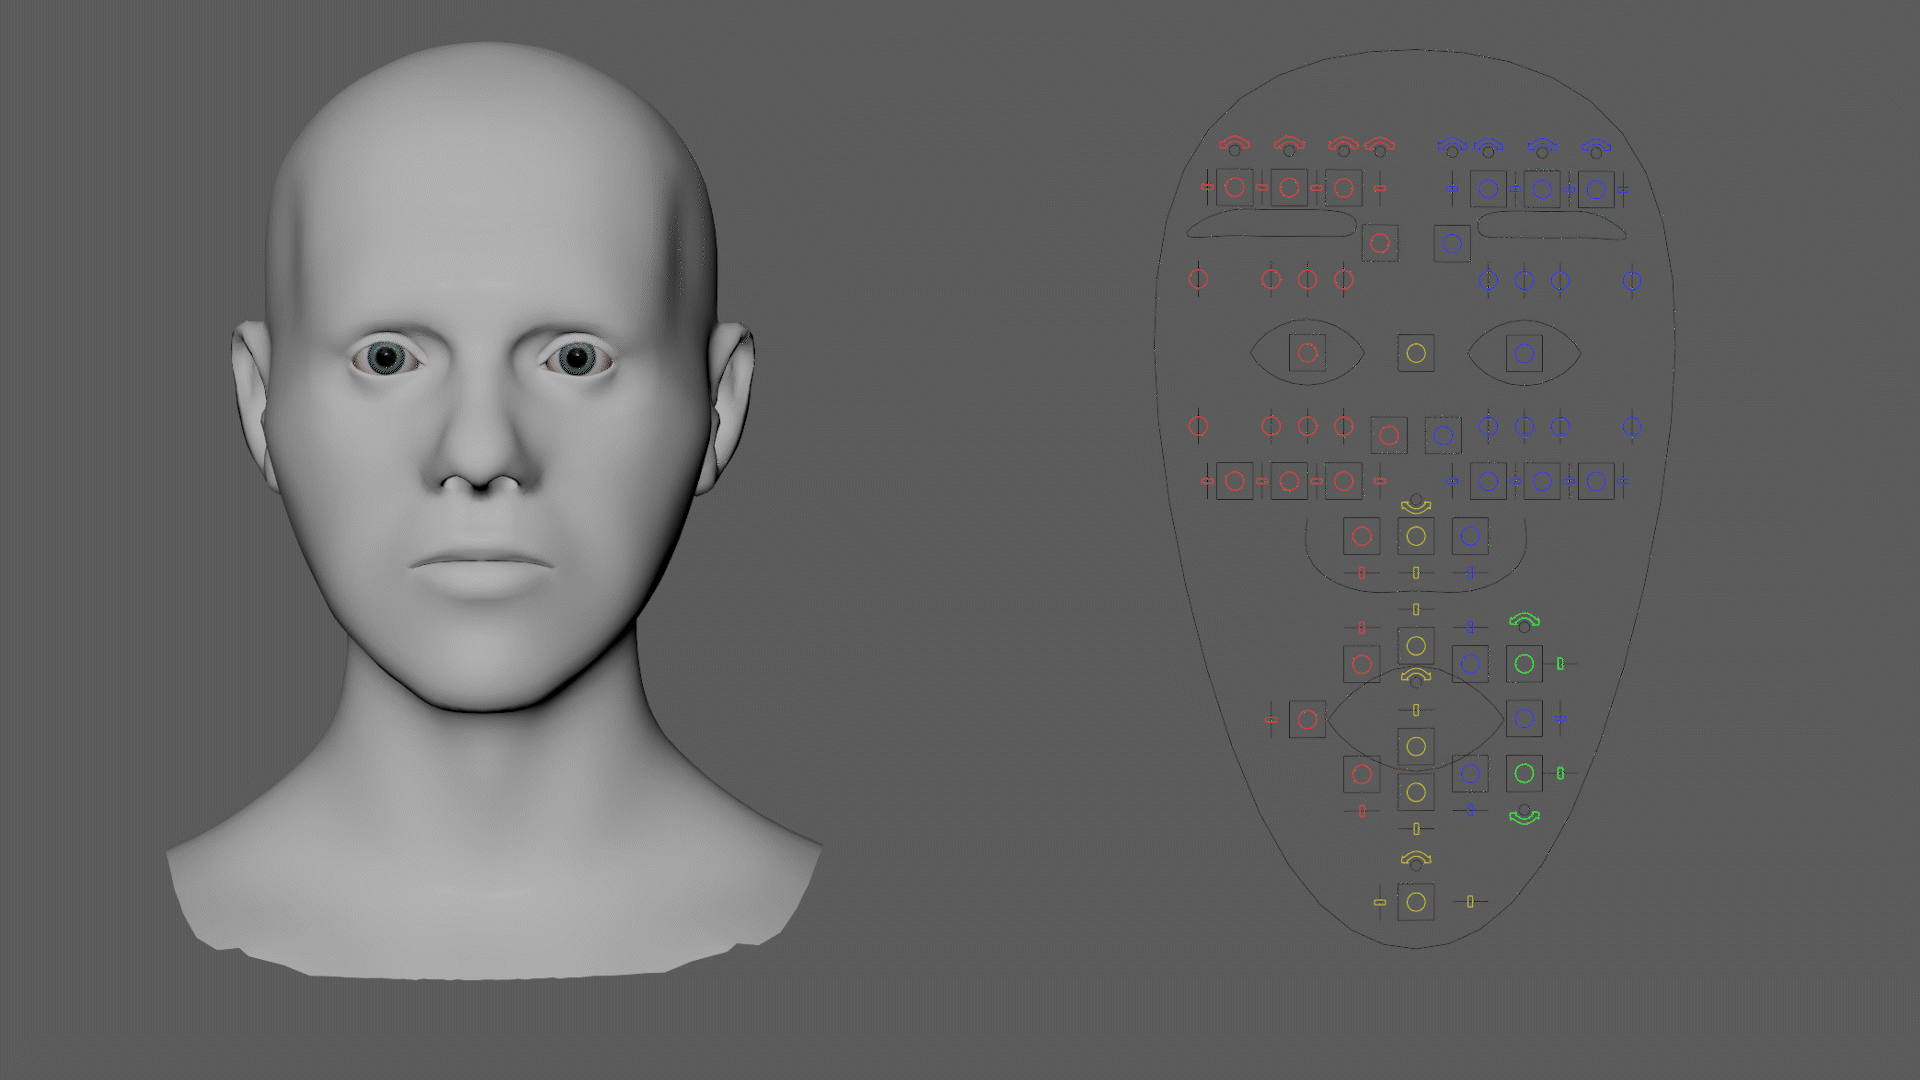
The second layer is a GUI that gives macro control to the animator, so they can quickly get movements that use multiple joints and require rotation along the contour of the face. Instead of set driven keys, this is a accomplished with my Arcpoint Constraint workflow.
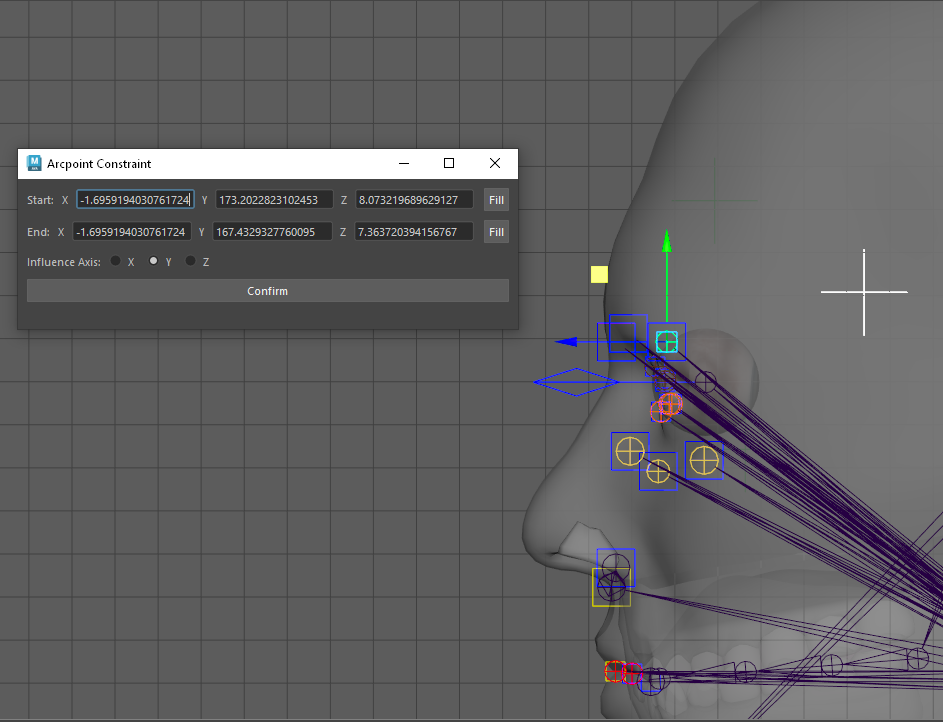
By establishing a minimum and maximum location for a range of motion, this UI will calculate the center point of a circle that includes the minimum, maximum, and joint as its arc points. A locator is placed at that center point, and will rotate the joint about its origin.
Some controls will move multiple joints. The jaw control for example articulates the three bottom lip joints and the mouth corners.