Modular Autorig System
Project Goal: Create a modular auto rig solution from scratch in Maya that can simplify the creation of skeletons, basic rigging systems (FK, IK, Stretch, etc.) and control shapes in order to leave more time for skinning, blendshapes, CFX, or other time intensive aspects of character rigging. The system should be fully reversible, and fully adaptable to all sorts of creature types.
My custom autorig pipeline is used to create every character rig found in my portfolio. I wanted to learn rigging from its basic principles, first doing a few rigs manually, and then identifying what basic concepts are most prone to human error. Normally cumbersome tasks, like assigning rotate order, managing joint names and orientations, basic systems like FK/IK, and designing curves for the control rig, are all automated with UI tools for user simplicity. This allows the artist more time to focus on more nuanced rigging tasks like proper skin weighting that vary from rig to rig.

Here’s an overview of the tools used in this pipeline.
Joint Tagger UI
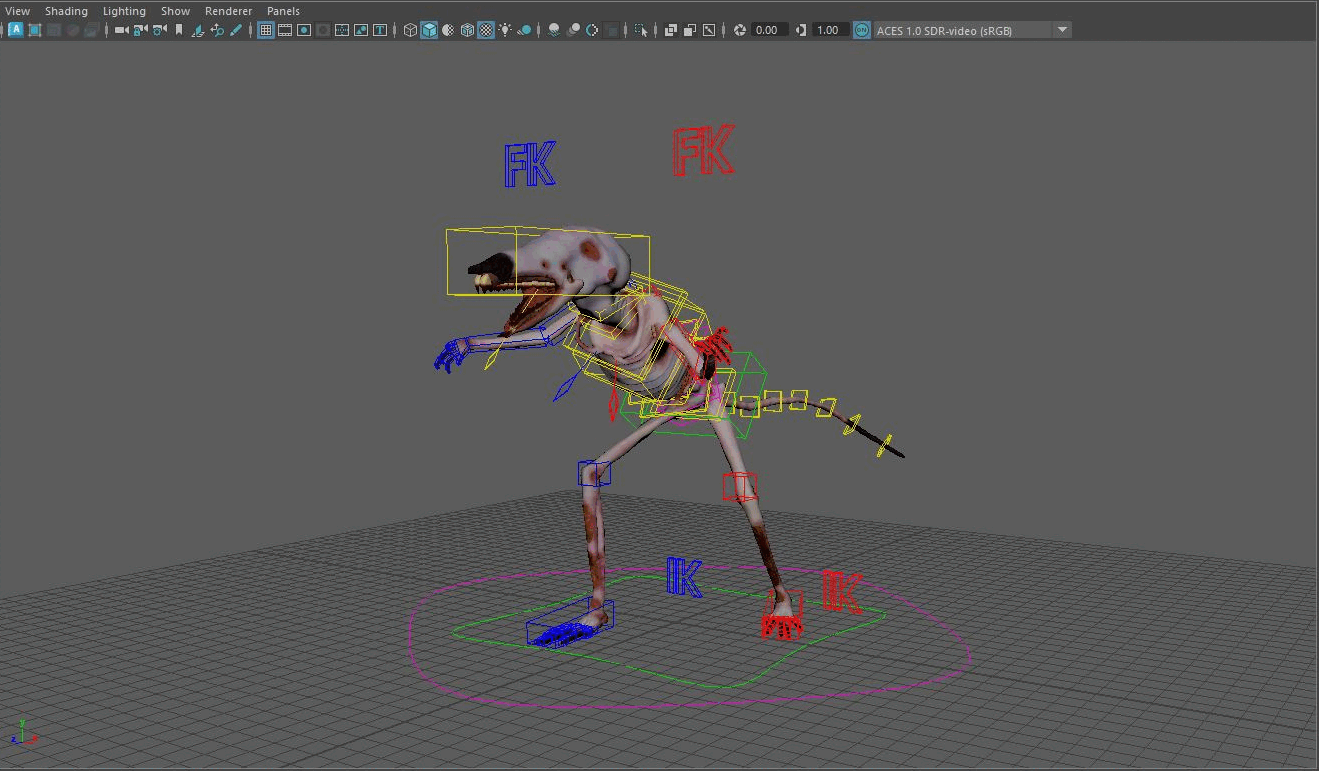
I follow the industry standard modular approach to rigging characters. Anatomical parts like a biped arm or a quadruped leg require the same basic setup from creature to creature. Take the biped arm, for example. The three main joints should be coplanar, with the same axis down the bone, parented shoulder -> elbow -> wrist. The only true task of the artist is to use their understanding of human anatomy to correctly place these joints where deformation will be most successful. My idea is that when creating a skeleton the only concern should be the translation of the joint relevant to the reference art. Everything else can be taken care of by using this UI to tag custom attributes defining the joints as part of a Biped Arm, and if it’s a shoulder, elbow, etc.

Tags can also be added to say whether this rig should generate FK, IK, and other basic systems down the line. This can be easily adjusted, since every time the “assemble” button is pressed, joints will re-orient based on positional adjustments, and regenerating the rig systems will do the same. In the case of the firefly example, the legs expect the same setup, and the animator would ultimately want the mirrored behavior that comes from Maya’s mirror joint tool. Custom scripts allow for same side module duplication, and mirroring between left and right sides will auto update the joints parameters.
Proxy Model Generation

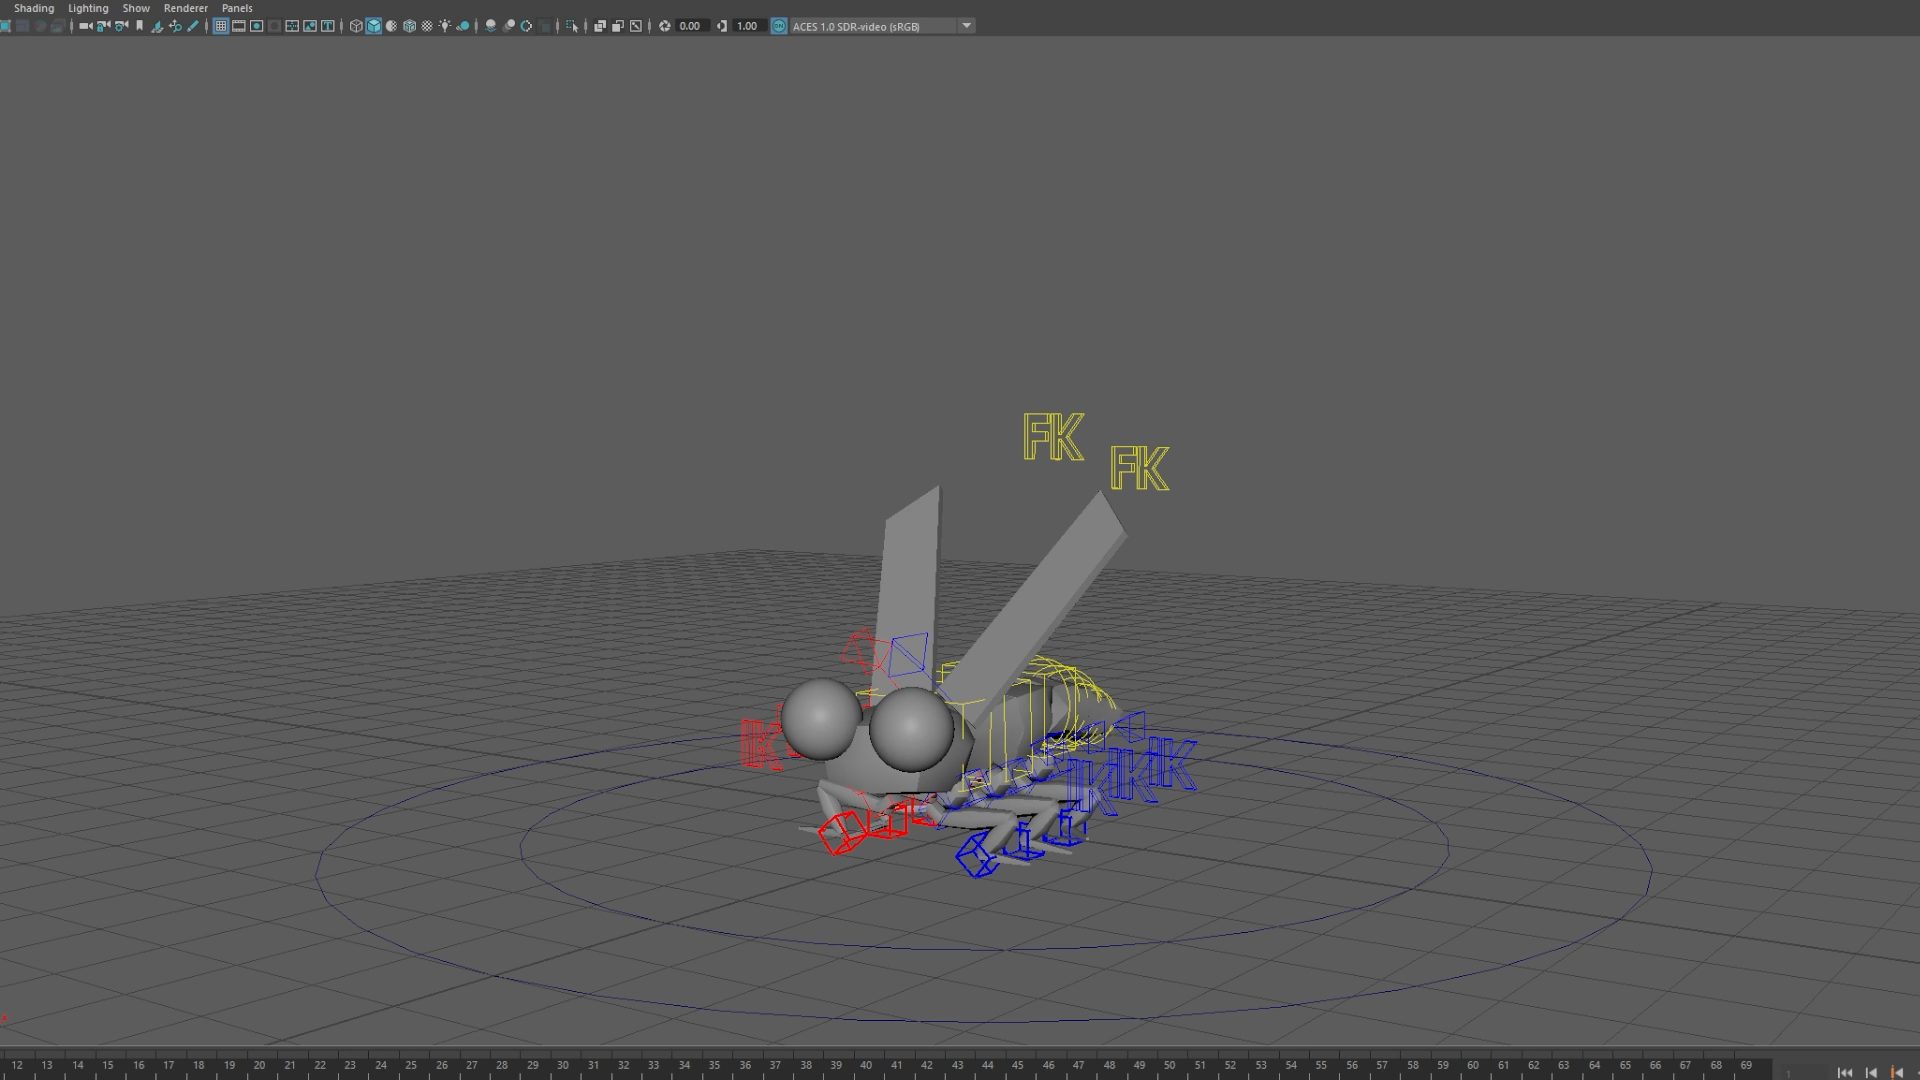
At the start of a character project I create a box model that can be animated to get a sense of if the proportions of the character design will work or not before fully committing to a grey model. Regardless of modules used, foundational polyCubes are generated along the length of each joint to give a starting point to match to reference planes. Should the underlying joints and systems be rearranged or moved, the polyCubes will be brought over with their edited shape to save iteration time. Similar to the joints, there is full support to mirror and duplicate shapes along similar modules, as shown in the demo.
Control Rig UI

A single function call will build out all of the underlying rig systems (FK, IK, stretch) according to the attributes assigned by the Joint Tagger UI. This will create primitive NURBS circles and locators that can be replaced using the Control Rig UI. A standard color scheme can be enforced, or individual controls can be given any color. Custom preset shapes like a cube, pyramid, or IK/FK switch with viewport feedback can be assigned and their size and draw thickness can be altered. All of this is done without adding any extra transform or breaking system connections, so shapes can be modified with this UI at anytime.
The demo of these systems is shown with a bug-type creature in its proxy testing phase. The pipeline also works with quadruped and humanoid creatures, as shown in other projects on my website, the Cheetah and Shrew. Any other manual rigging, like helper joints, SDKs, blendshapes, can be layered on top of these foundational systems. My goal is to eliminate the tedium and human error of creating a standard, workable rig, so that other concerns like deformation and CFX can receive the time they need to be high quality.