Handling Characters with Rigid Body Parts
In the past few months my personal toolset has expanded. Initially just an auto control rig, the module system is expanding into an end to end solution to get retopologized characters into an animator’s hands as quickly as possible. While developing these tools, I have been testing them on various iterations of human base meshes I sculpt in ZBrush. This is beneficial since the majority of video game characters are humanoid, but I now want to stress test my scripts on a character that doesn’t fit cleanly into a preset.
Brachur
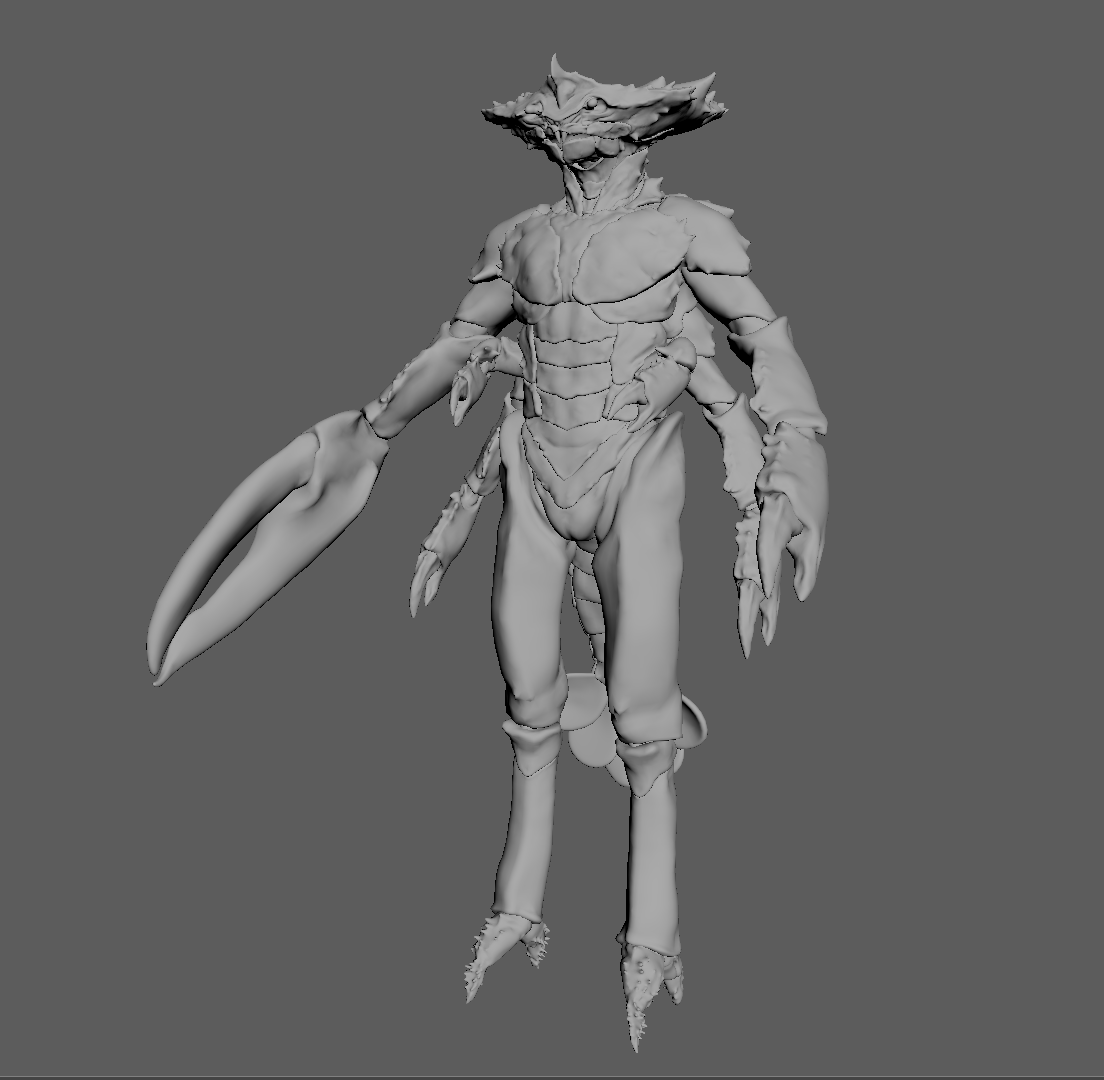
Original Artists Johnny Fehr and Scott Denton: https://renderman.pixar.com/making-of-brachur
This creature rig, suggested as a challenge at RiggingDojo, is what I settled on. It takes elements of a lot of less common creature types, with multiple arms, a tail, and a combination of rigid and organic forms.
The original challenge was to attempt to take the rig as far as you can in an hour. In spirit of this, I have been doing hour long dry runs of the character from scratch, using only vanilla Maya and my own tools. This has been valuable for my testing, since I usually get sidetracked adding features and fixing bugs as I use my tools. By forcing myself onto a time limit, any errors or issues with my pipeline just have to be noted while I do a manual workaround.
One bigger change to my modules was adding another inheritance layer between the Base module and the specific character parts. This represents Basic modules, generic chains that are normal stand-ins for arms or spines. This allows me to bring in modules with varying length, and then specific modules like a human arm can expand on their parent class for options like corrective shoulder joints.
class ModuleBasicFinger(ModuleBase):
    cls_module_name = "basic_finger"

    def __init__ (self, side, length, *args, **kwargs):
        self.length = length
        super().__init__(side=side,*args, **kwargs)


    @property
    def ID_list(self):
        chain_list = []
        for i in range(self.length):
            chain_list.append(f"finger_{self.side}_{str(i+1)}")
        chain_list.append(f"finger_{self.side}_end")
        return chain_list
Quicker Rigid Skinning
The rigid exoskeleton parts of this character were the first major issue causing a lot of time loss in the initial skinning pass. The entire character is made of 125 shells, the internal tracker for parts of the mesh that are continuous. If I were to use any of the default skinning methods, I could get vertices to be 100% assigned to one influence, but it would not respect the boundaries of each shell. This is a similar problem that I ran into when rigging the stylized Cheetah.
while total_verts - visited:
            seed = next(iter(total_verts - visited))

            cmds.select(f"{geo}.vtx[{seed}]")
            cmds.ConvertSelectionToShell()
            shell_verts = list(
                int(v.split("[")[1][:-1])
                for v in cmds.ls(sl=True,flatten=True)
            )
            [visited.add(shell_vert) for shell_vert in shell_verts]
            shells.append(shell_verts)
ConvertSelectionToShell() is the key function that allows me to get a list of vertices for each shell in the character. This effectively replicates the behavior of triple clicking a vertex, where all of its connected vertices are selected as well. From there, we can take the average of the positions of the vertices in the shell to get the center.
My original idea was to take that center position and find the closest joint to it. I could then take this shell-joint pair as a dictionary and flood the correct weights programmatically. This was close, but the issue became obvious, especially in this character.
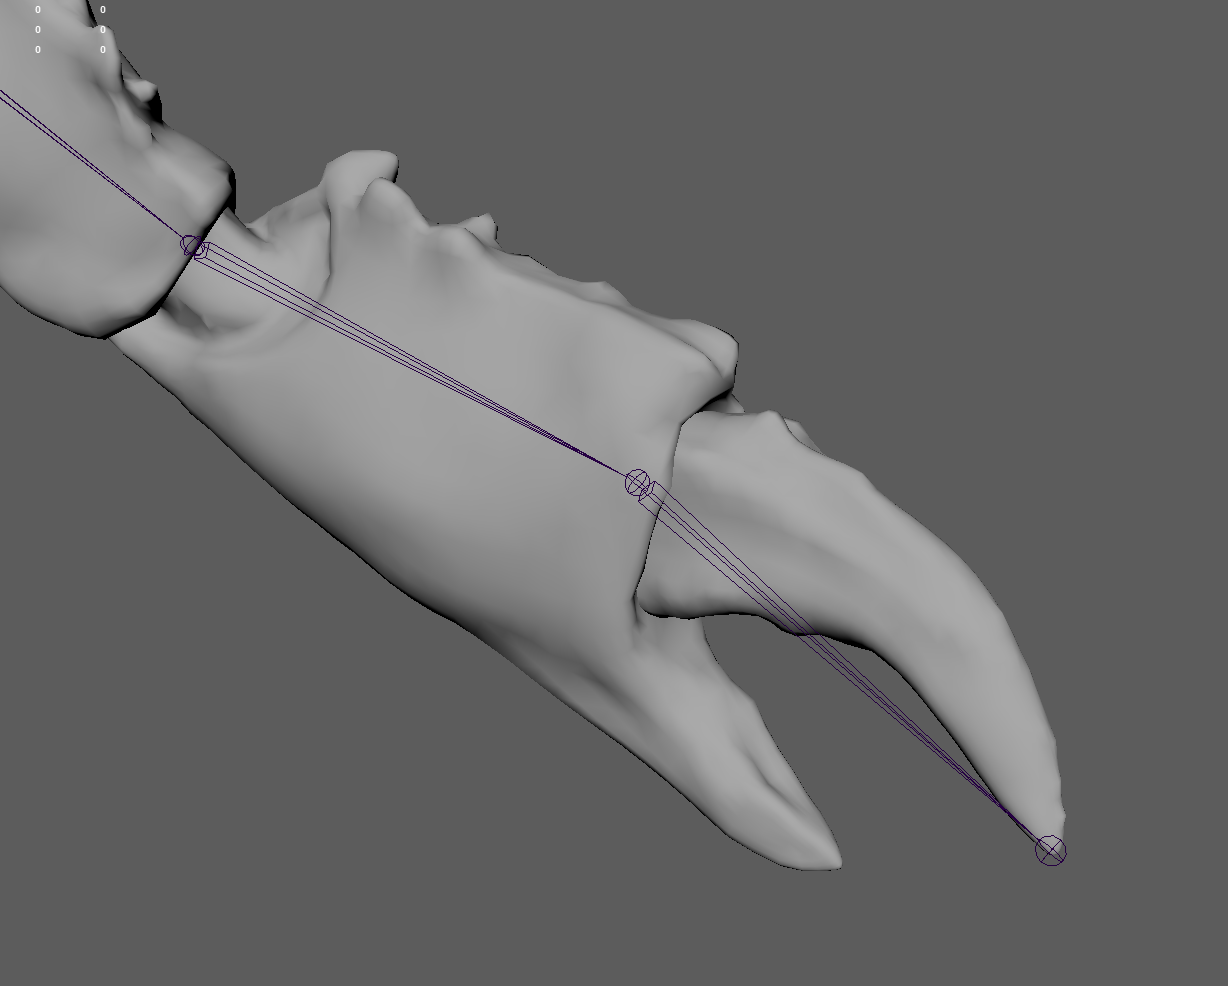
In general, if I want to assign a rigid piece to a joint, like the wrist here for example, the joint is going to be placed at an end of the mesh piece, not the center. That means that factors like uneven vertex density and irregular shell shape could mean the center is closer to the claw joint.
The final solution is to take whatever joint is closest to the center and query the joint before and after it in the chain, which is easily grabbable information in my module classes. The joint closer to the root will be assigned U=0, and joint further away is U=1. That gives a reference vector direction to establish what side is “bottom” of the shell. I then query which vertex has the lowest U value, and find the closest joint to that vertex. In this model, there are 125 shells, and only 10 are erroneously assigned, like the end of the lobster tail. Manually flooding 10 shells takes much less time than the entire model, so I consider this a success. After this step, I get a good start on shells that need multiple influences as well, since the full weight of that shell will be assigned to one of the nearby joints anyway.
This could be improved in the future so I can get full accuracy, but any solution I am considering at the moment still requires some amount of manual input, like assigning what module or direction a shell should be facing.