Dynamic Wrinkles for Real Time
My most recent project has been exploring different deformation techniques for rigs and animation in Unreal Engine. I have been creating a face rig for this project, and wanted to incorporate dynamic wrinkles to give more believability to the emotional range.
I wanted to try out using normal maps as a way to add that detail without blowing up the tri count. I wanted to start to explore setups for character shading effects in Maya and Unreal Engine, something I find a fascinating topic on top of traditional rigging for technical artists.
Sculpting
Before doing the wrinkles, I already had the base mesh sculpted, retopologized, and rigged. For each major wrinkle in the face, I articulated the closest joint in my rig in that area to its maximum, and then exported that static pose into ZBrush. The wrinkles that I determined most important are the frontalis wrinkles, the eleven lines, the scrunched nose, crows feet, and nasolabial folds. For some expressions, like disgust, it is almost unreadable without the wrinkling on the bridge of the nose.
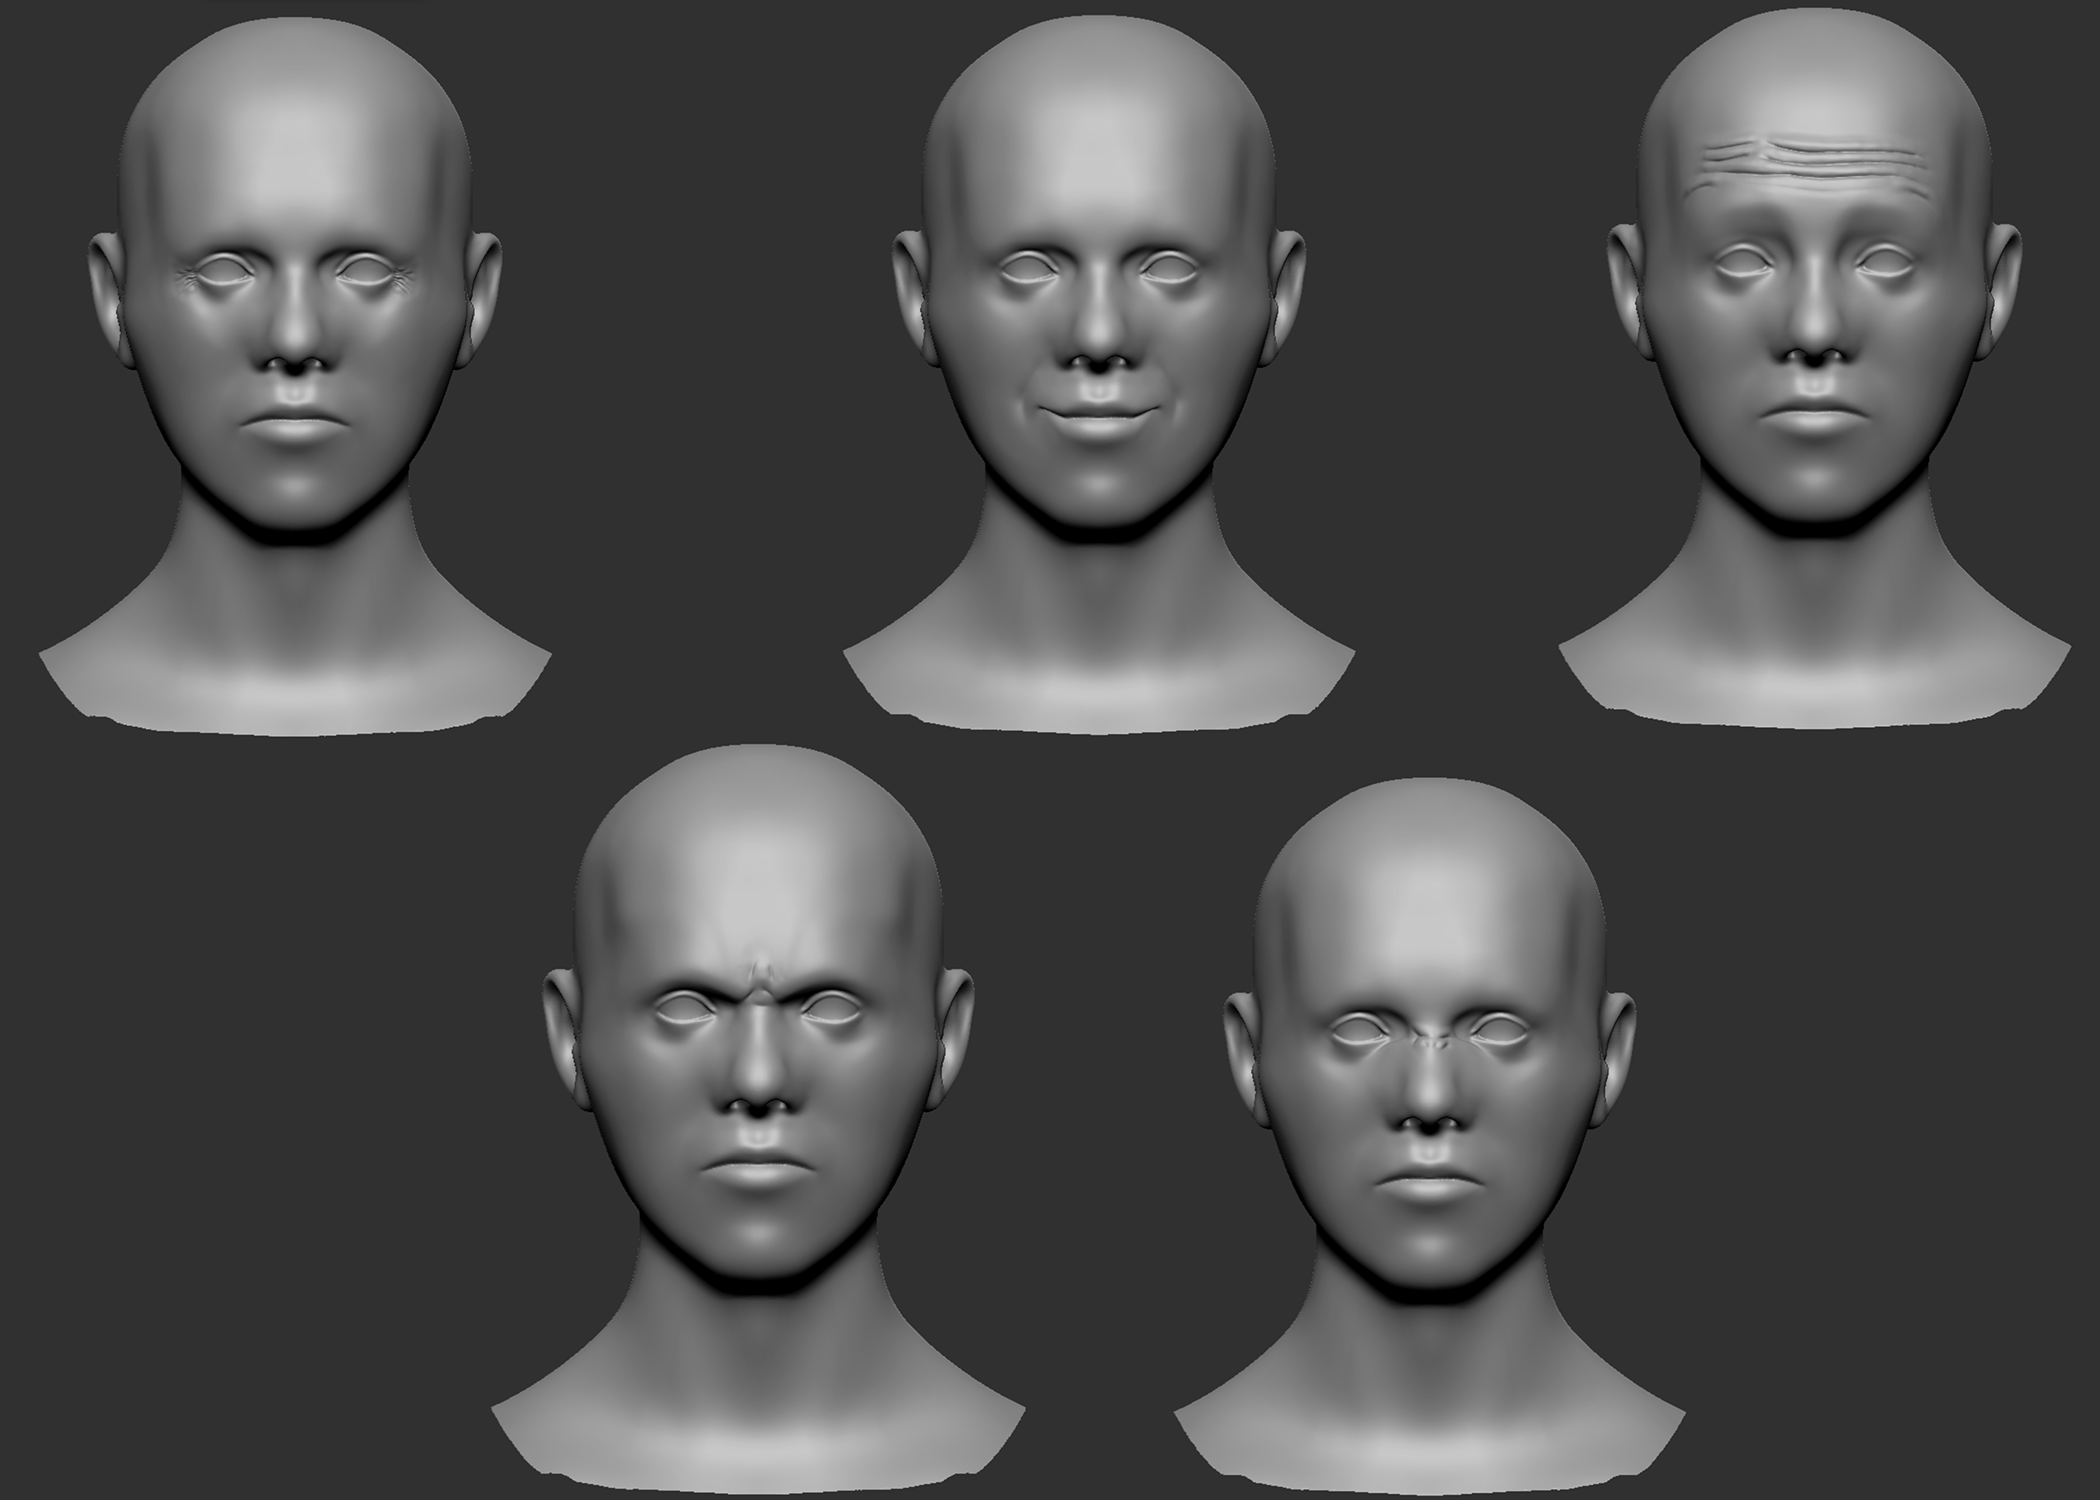
From there, I baked the wrinkle sculpt onto the default pose low poly mesh in Substance Painter. Face wrinkle behavior is for them to fade in as that area of the face are articulated. Only in extreme situations do the wrinkles actually move while visible. For this reason, I was able to bake them at the neutral position, and then they would be opacity masked in as controls were articulated.
Keeping in mind performance, instead of having a separate normal map for each wrinkle region (9 total, including breaking up symmetrical wrinkles), I merged them all into one. That single normal map would then be masked by a 0 to 1 greyscale texture, which is cheaper since it only uses one channel.
Normal Map Integration
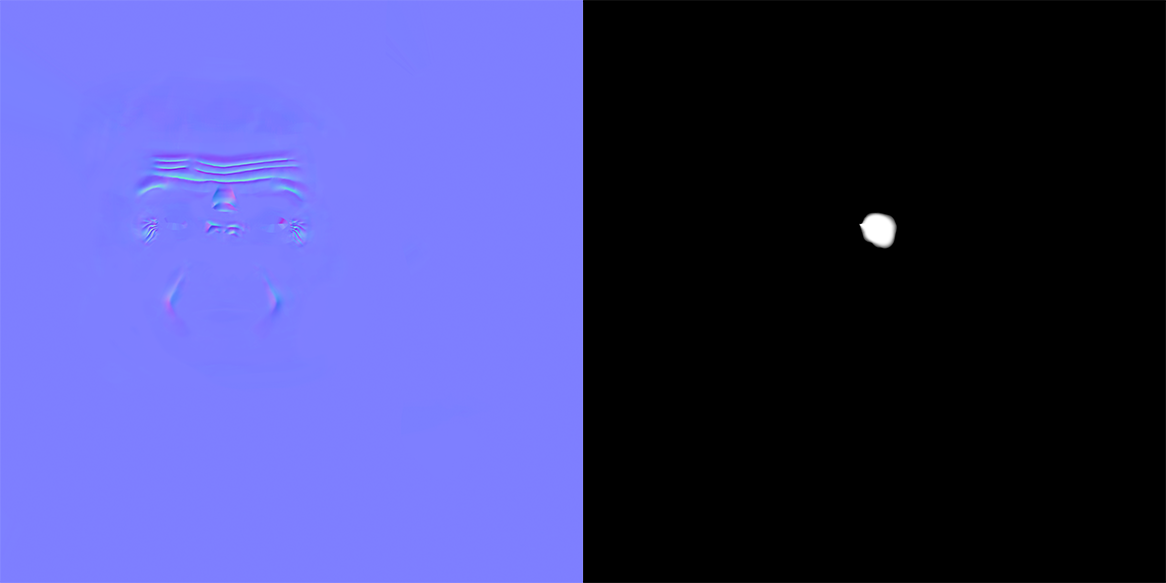
Above is the final normal map I am using, along with an example mask, the one used for the left crows feet. Each mask is controlled by a joint displacement parameter that blends them together when certain parts of the face deform.
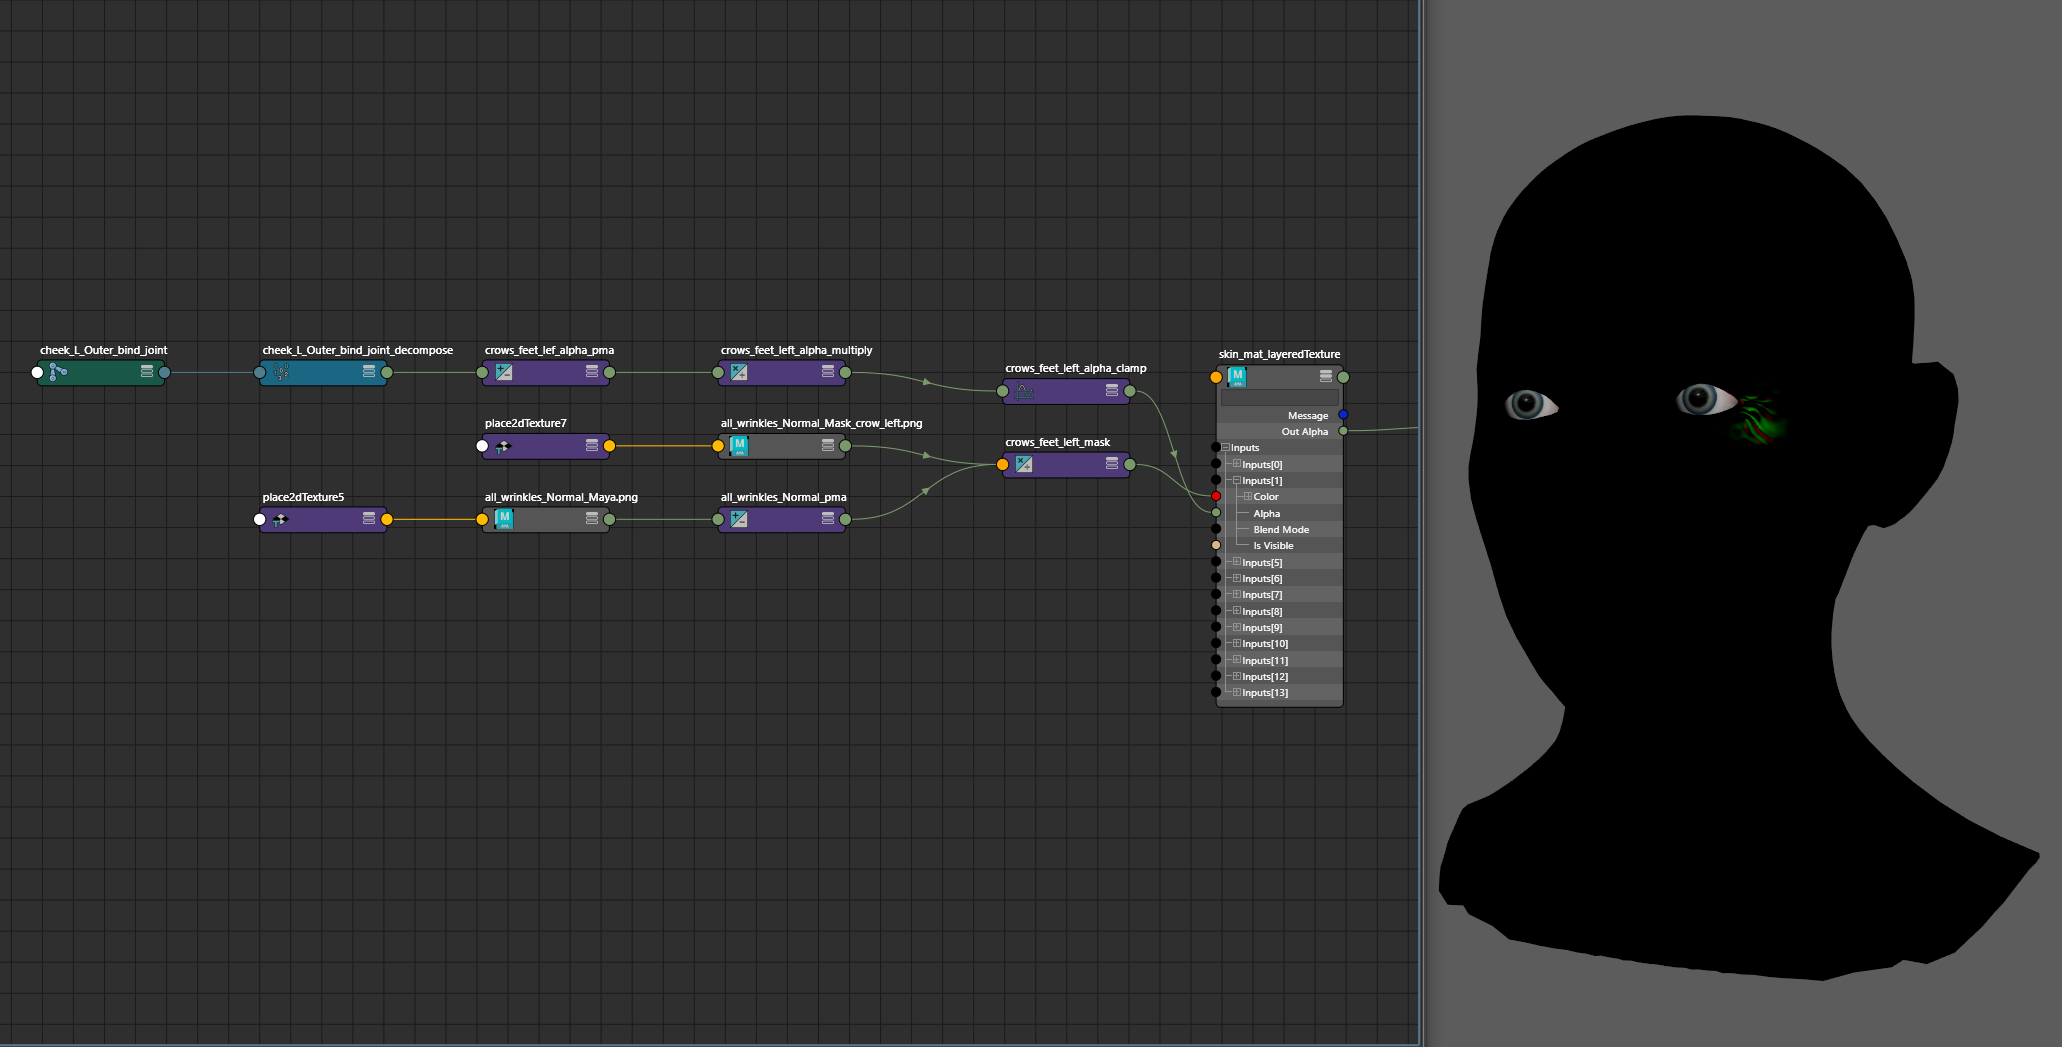
Although this character is going to render in Unreal Engine 5, I figured it would still be crucial for the animator to be able to see the wrinkles move while they worked, instead of having to guess and wait until the animation was brought to Unreal Engine. This can be done by subtracting out the blue channel of the normal map, and then driving the mask as an alpha in a layeredTexture node. An important note is that you will not get viewport feedback if you are using Parallel Evaluation. On the layeredTexture, I use a 0,0,1 map as the base, with None blending, and then each layer of masking is done in the Over blend mode.
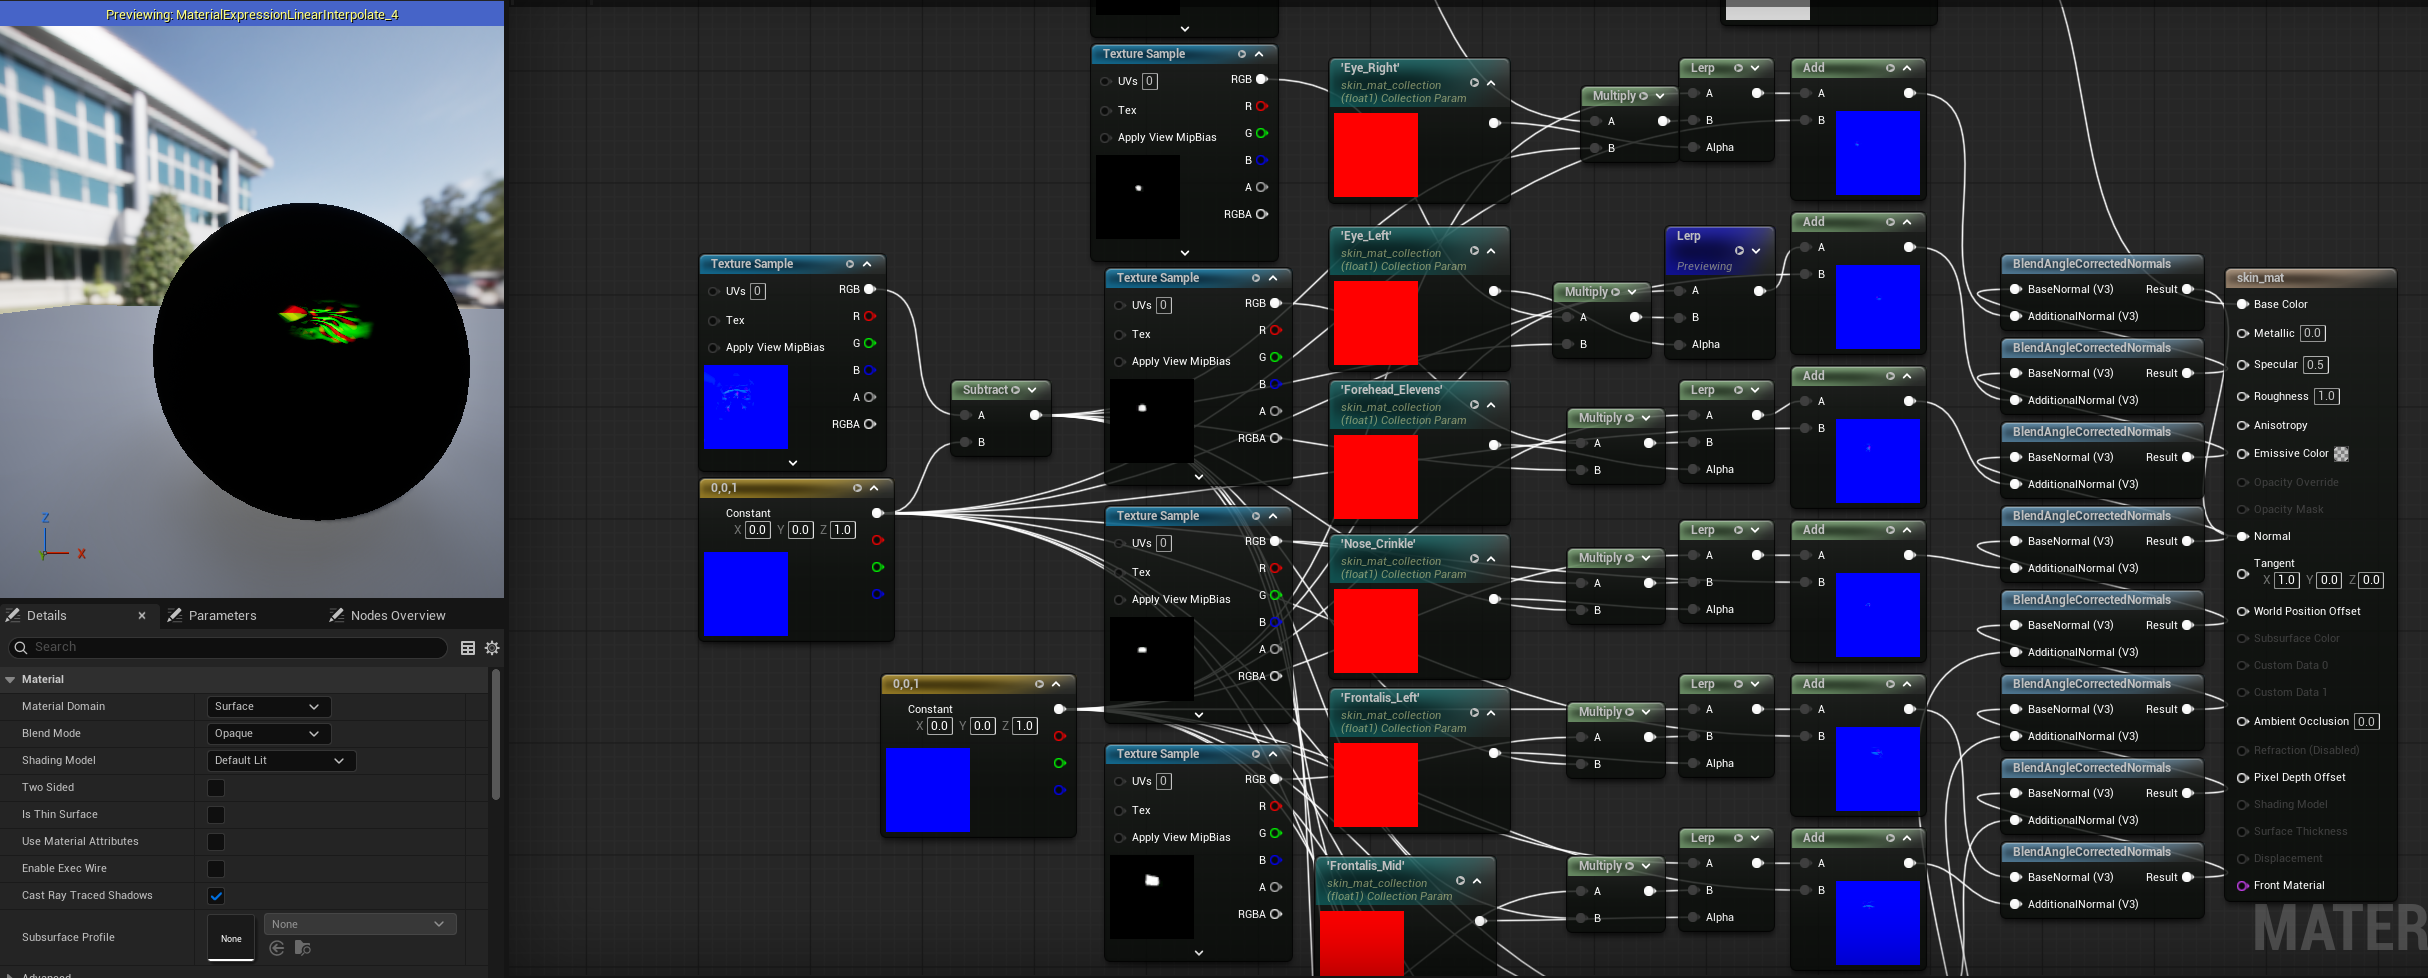
Getting this to work in Unreal Engine requires a few extra steps. Above is the material blueprint, which is similar to the Hypershade implementation. The only difference is I’m using BlendAngleCorrectedNormals as a replacement for the behavior of the layeredTexture node in Maya. You can’t directly access the joint data in the shader, so all of the masks are controlled by parameters in a Material Collection.
At runtime, the Character Blueprint queries the bind pose position of the relevant joints to make the wrinkles. In the animation blueprint, those base values are subtracted from the current position of the joint at the frame of the animation. The resulting difference controls the value of the material collection parameter, and will update the shader at that frame.
This is a workflow and technique that I would like to use for future characters, so I’ve been thinking about some improvements.
In cases like the crows feet, you could use one mask instead of two, and flip that mask mathmatically to save on the amount of textures loaded into the scene. This would require the UV shell representing the front of the face to be at the midpoint of the UV layout, or have some sort of tool that could reliably find the exact center of that shell. For instance, taking a user defined vertex on the center of the face, and using that to calculate what value in U the midline is at.
The material, character blueprint, and animation blueprint are using a repetitive chain of nodes that could be packaged into macros, only needing to be fed the mask and normal map.
The joints are queried at BeginPlay. Ideally, this information would be gathered for the shader logic in some sort of constructor, because the static bind position of the joints is not something that changes when the game starts. It is causing unnecessary overhead that could bottleneck with heavier assets and scenes.