Face Rig Progress Update
These first few weeks of this project have been focused on really nailing what joint positions, topology, and weight patterns would serve as a good foundation to build more specific shapes and normal maps on top of. In this post I will be separating topics into the progress on weights and the progress on controls.
Weights and Joints
In its current state, the skin mesh of the head rig is influenced by 35 joints, as well as a few additional for the eyeball, teeth, and tongue meshes. My targets for this rig remain the same: a lip sync test, and a convincing performance of the six main expressions.
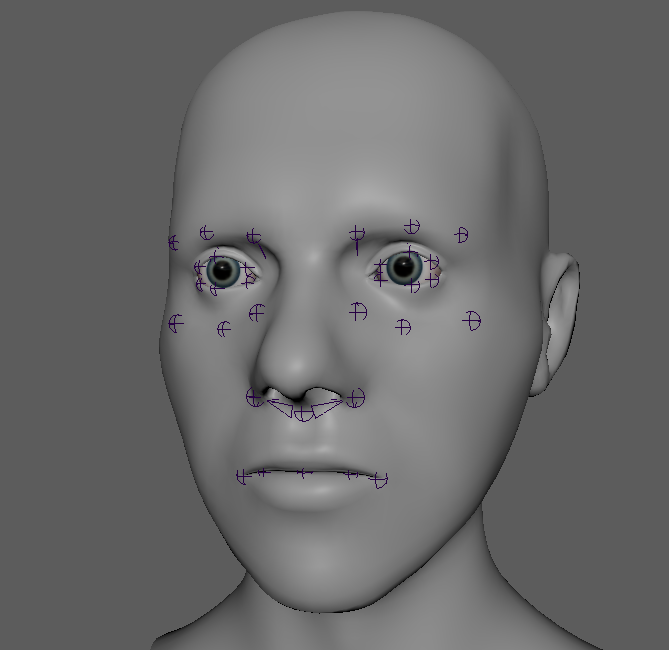
The joints pictured above allow the rig to hit the various movement types defined by Brian Tindall’s The Art of Moving Points. I am looking for a style that is lightweight but convincing in performance. The joints are laid out to the specifications of the three curve principle, which gives a lot more control than I need, but is great for finer tweaking. I’ve decided to keep the bind joints in world orientation, since tweak controls on the face start in world orientation, and creating arc movements for the GUI is easier when starting with clean data.
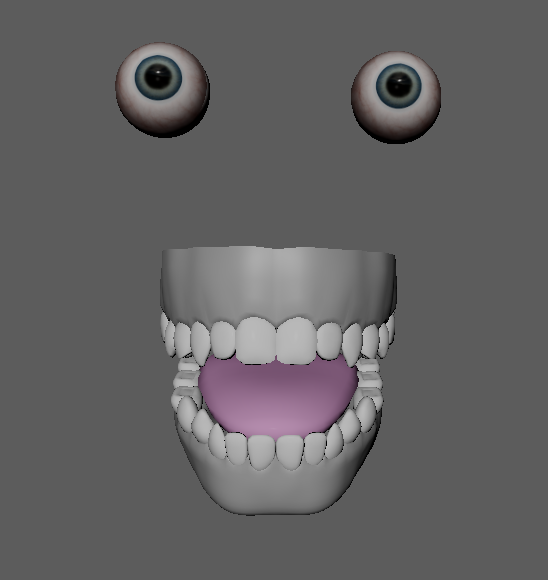
I added some basic mouth meshes I sculpted in ZBrush. Just the presence of teeth is very important to the readability of emotional performance, and the tongue will add extra dynamism to lip sync if I have time to flesh it out that far.

For the weights I started with a simple pass to define areas of vertices that I want to stick together, like shown on this Middle Lower lip joint. Once that is locked down, the actual deformation animation tests will show what needs to be rebalanced in the areas that are effected by multiple joint groups (upper lip and cheek, for example).
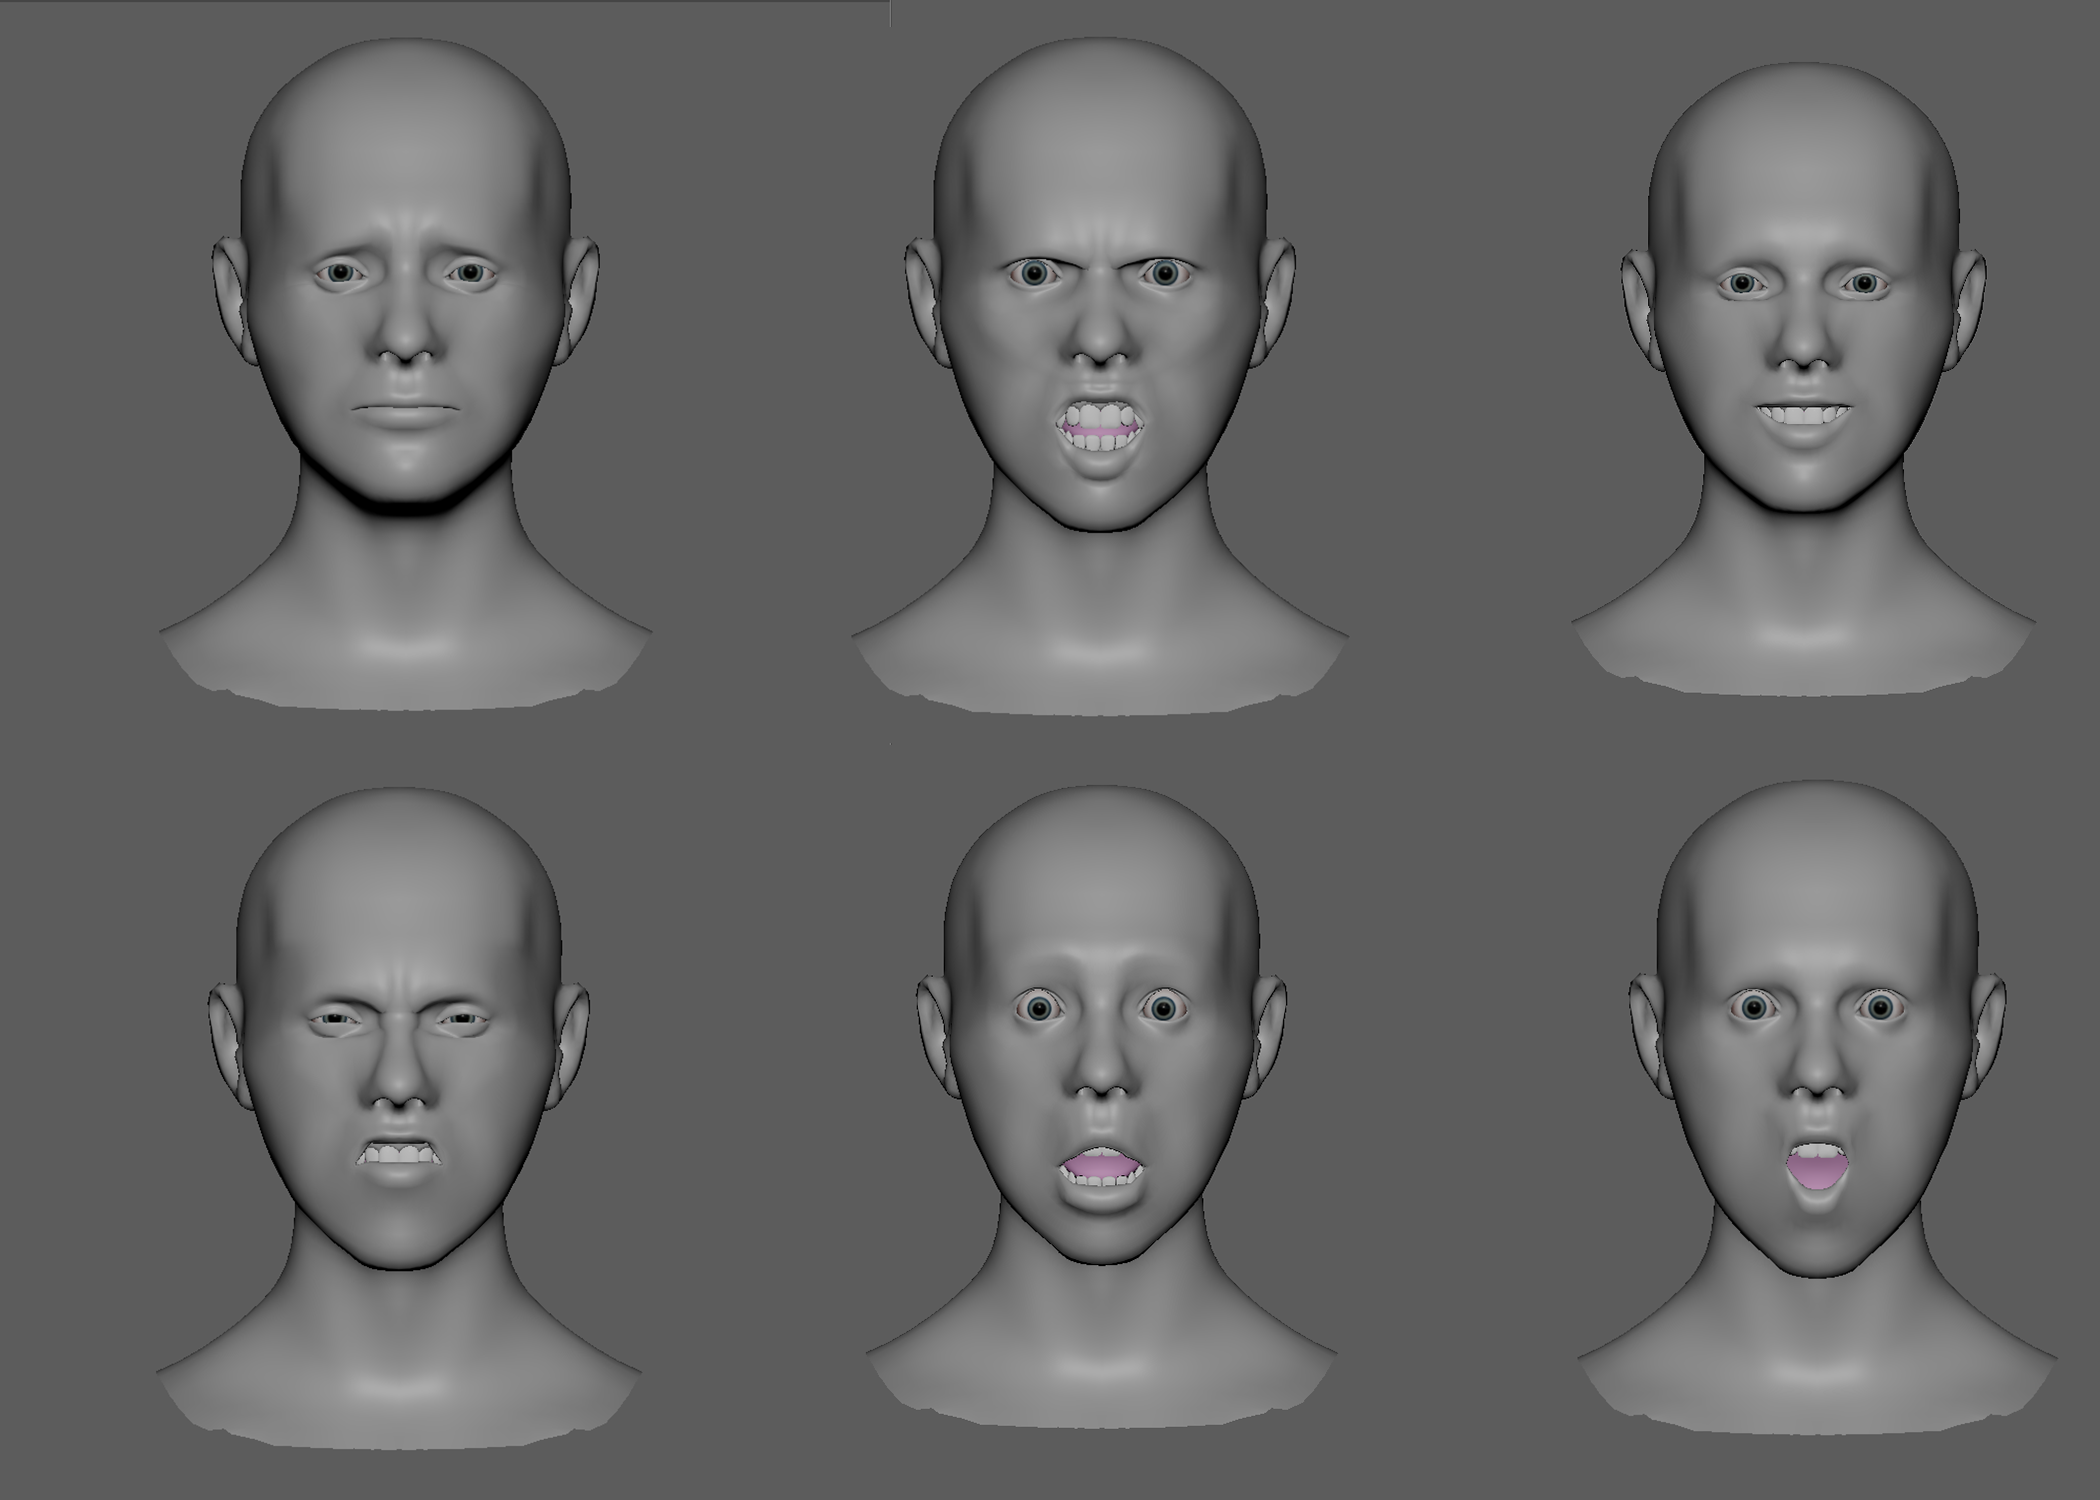
The weight painting theory only takes things so far. The next important step is to pose out the main animation targets, and find what is failing. For my current setup, the sadness pose in the top left is working quite well. But the same weights are not good on the anger expression, where the eyebrows are not holding volume in the squeeze pose, and the upper lip is getting a crease where there shouldn’t be one. This puts me in a good spot to do a second good pass on the weights, and once I feel I can’t push it any further, I can start to consider adding shapes. There are some topology concerns, like with the corners of the mouth being too sharp, so I will probably do another quad draw pass before UV unwrapping.
Two Layers of Control
For a number of reasons I have become committed to using matrix nodes and math for my rigs over native Maya constraints. One big advantage in this project is that it is extremely intuitive to add a hierarchy of control to a specific joint without worrying about any kind of cycle.
At the lowest level, each joint has an associated topological control that allows the animator to perfectly place that area of the face as they want without restriction. This is especially helpful when wanting to make final tweaks on top of the rotation curves I have built into the rig.
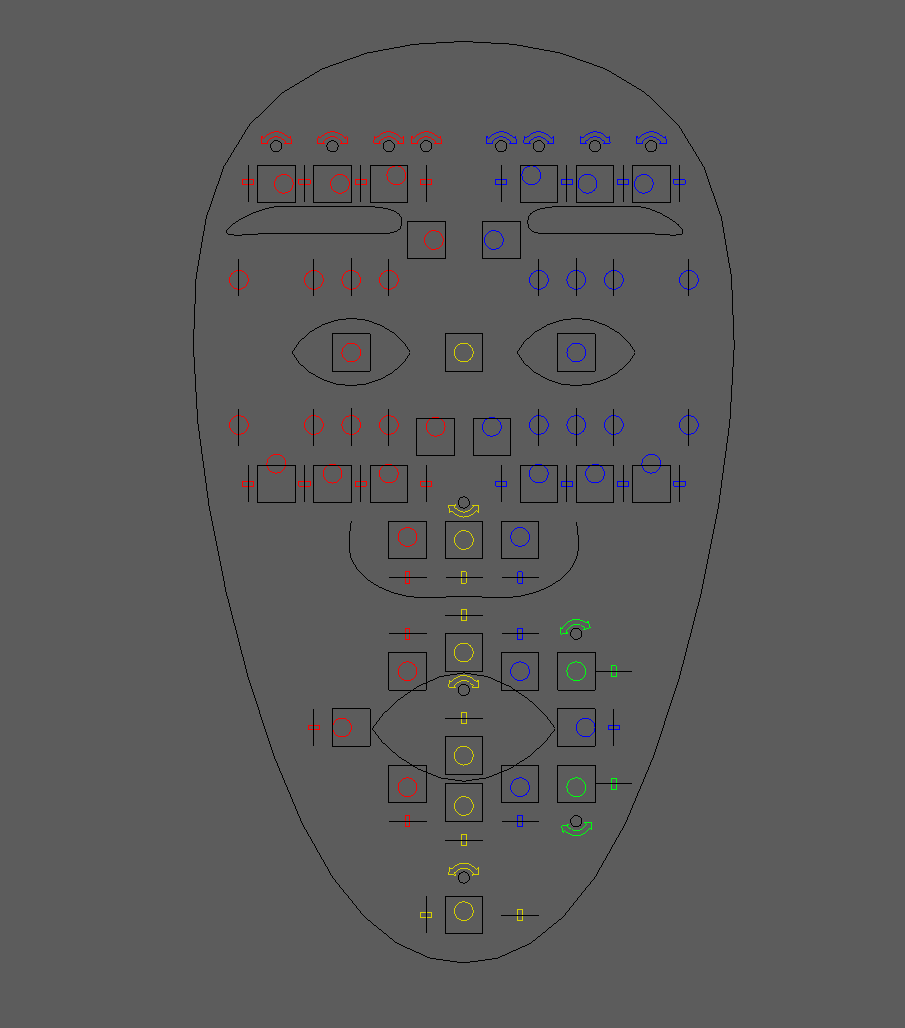
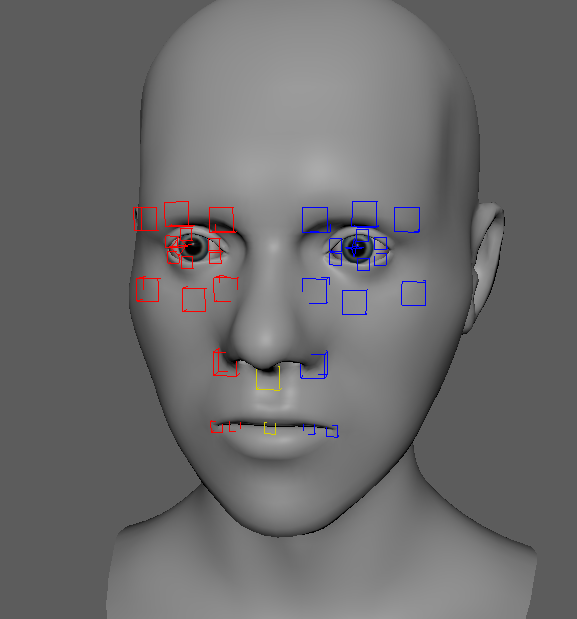
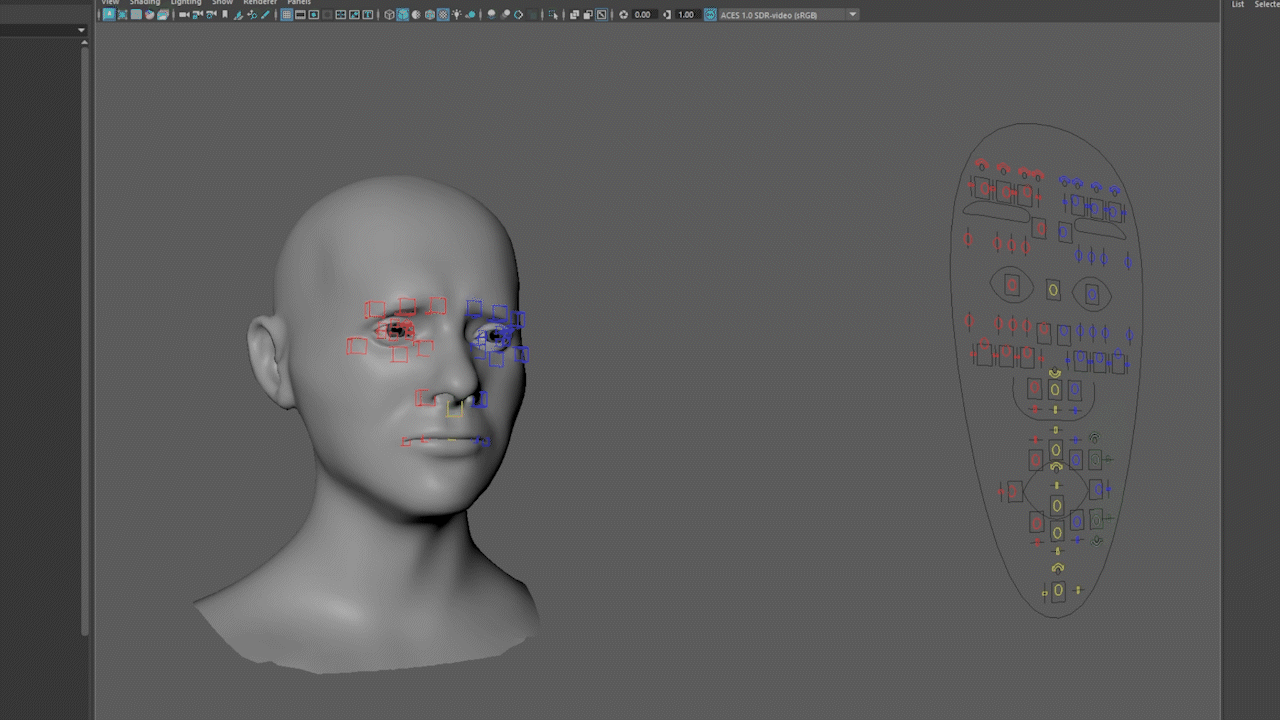
To help the animator along, I have created this GUI that is in full control of the shapes on the face. The eyebrow control on the top for example, allows the animator to get a quick raise, furrow, twist, or jutt of each of the three joints on the brow individually or all together. When the brow control translates positive in Y, it is actually rotating the corresponding joint around a pre-defined pivot point. This makes it so when a joint’s default behavior should follow the contour of the face, the animator can quickly get the joint to move on that path, and respect the animation principle of arcs.
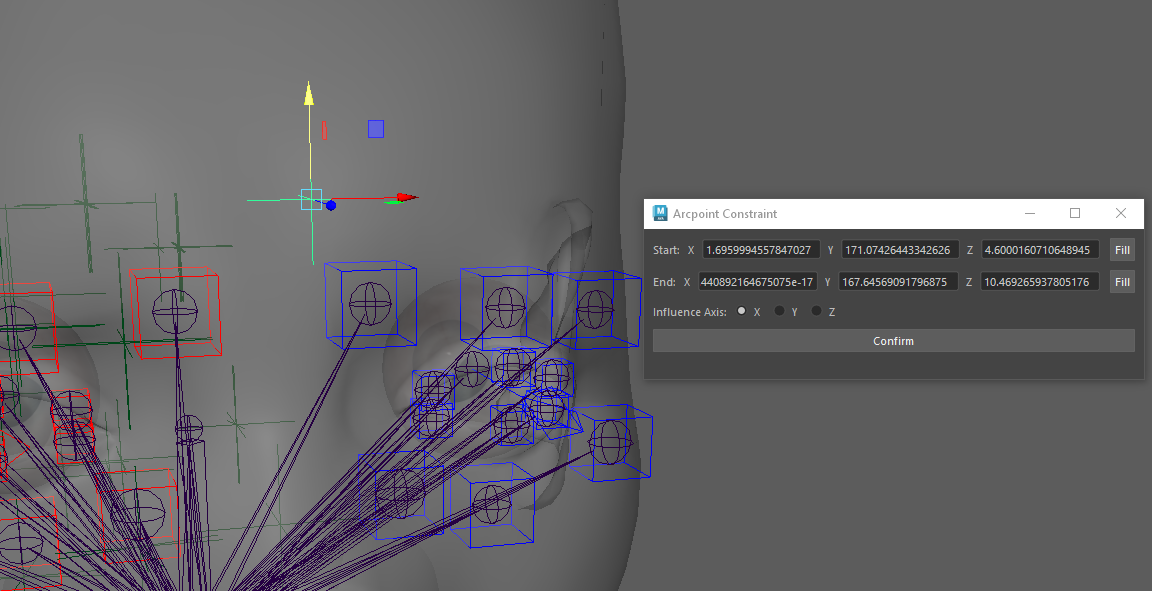
This Arcpoint Constraint UI I created makes the process more artist friendly. For this process, I create two locators, place one at the ideal maximum, and one at the ideal minimum range of motion. The selected control will serve as the midpoint of the three points of an arc, and the centerpoint of that shared circle can be calculated. The centerpoint is shown by the highlighted locator in the image above. When the animator translates the GUI control for the eyebrow, they are actually rotating the tweak control around that calculated locator. This method is limited to only circles, so arcs won’t vary in tangential slope along the range, but it still gives great performance just in this iteration.
This rig has reached a solid point where I feel all of the systems are in place and I am able to create a rough version of the poses that I’m after. The next phase will involve pushing this rig as far as I can to make those six expressions as believable as possible. While I initially considered adding wrinkling maps as a bonus if I have time, the lack of nasolabial fold and nose scrunching makes some of these poses unreadable, so sculpting those is a priority.
Another thing that would enhance the project would be hair cards for eyebrows and eyelashes, though this was never meant to be a texturing exercise, as shown by my basic lambert coloring. Once I get these targets to a good place, the next step will be exploring the process to get it running in Unreal Engine.